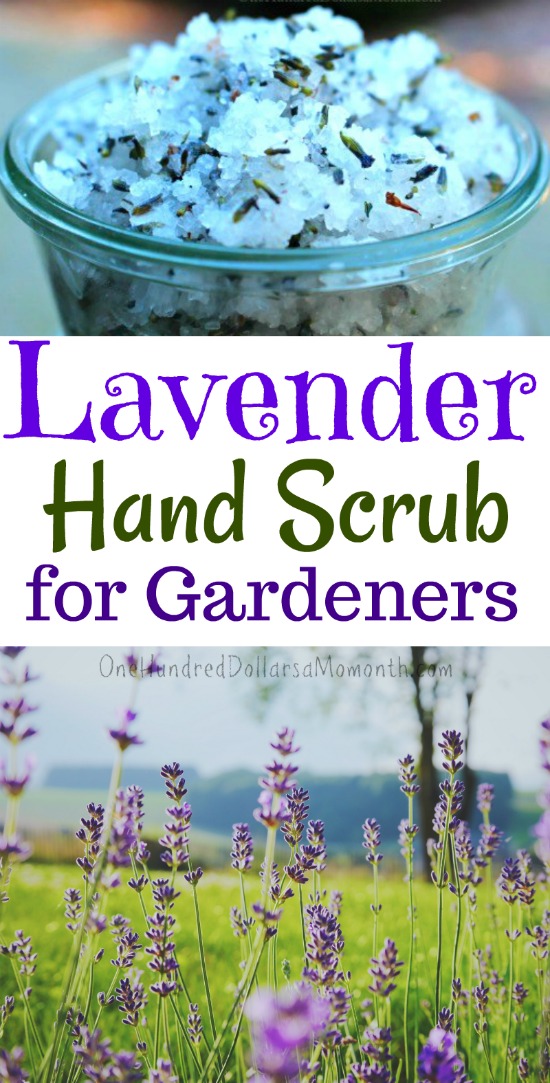
Lavender Hand Scrub Recipe
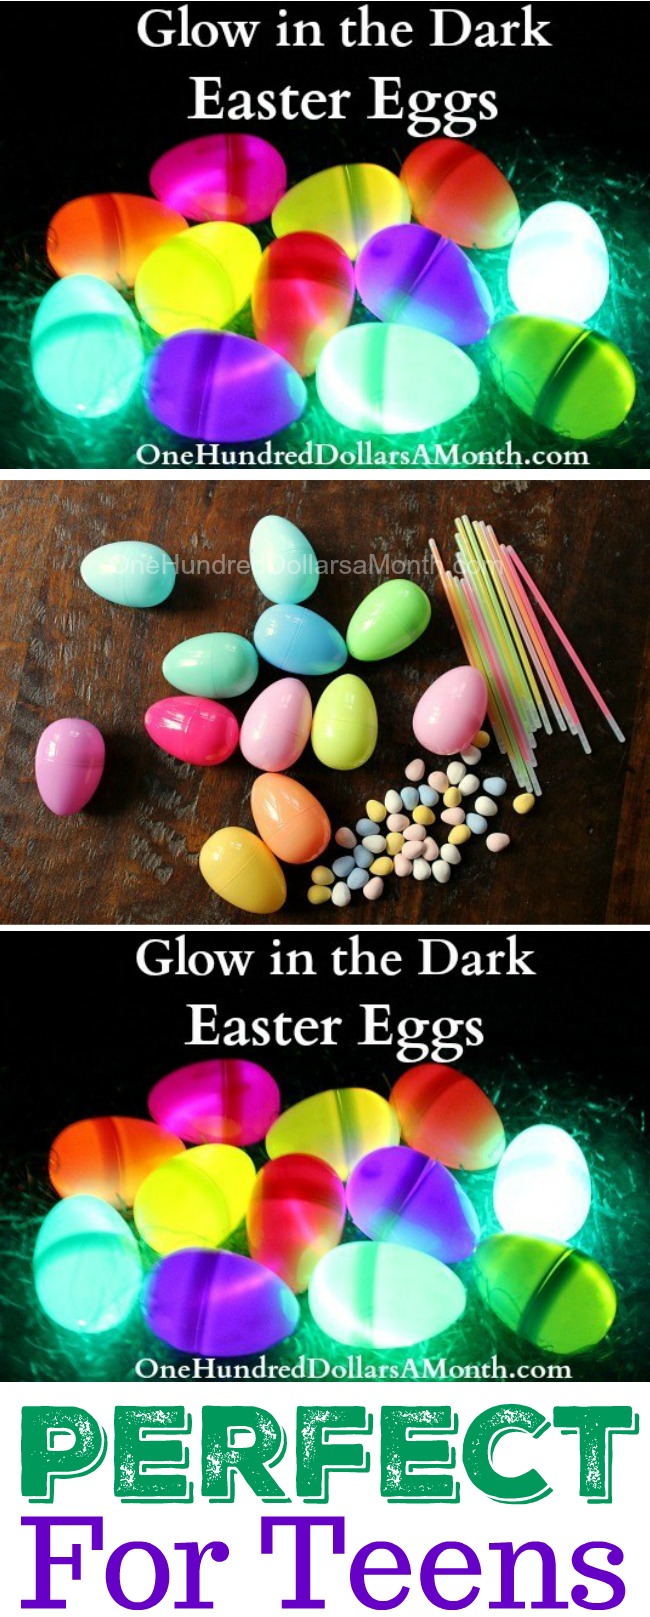
Glow in the Dark Easter Eggs with Glow Sticks
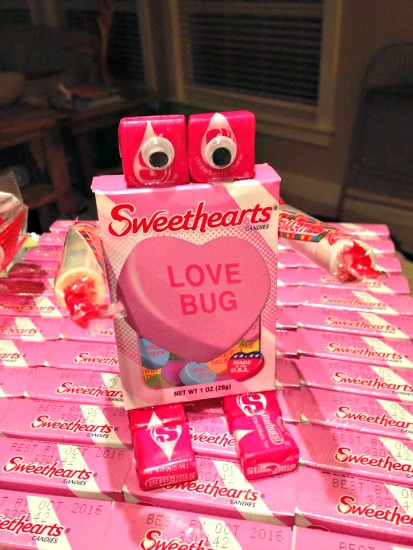
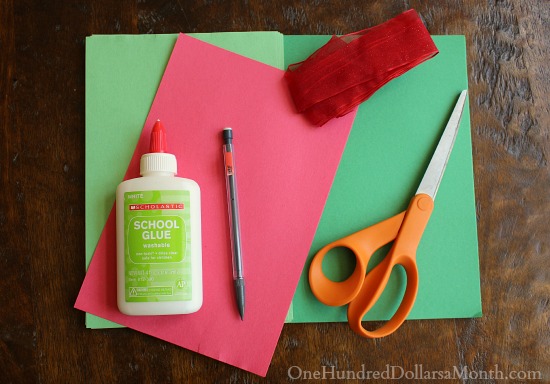
Easy Valentines Craft — Conversation Heart Robots
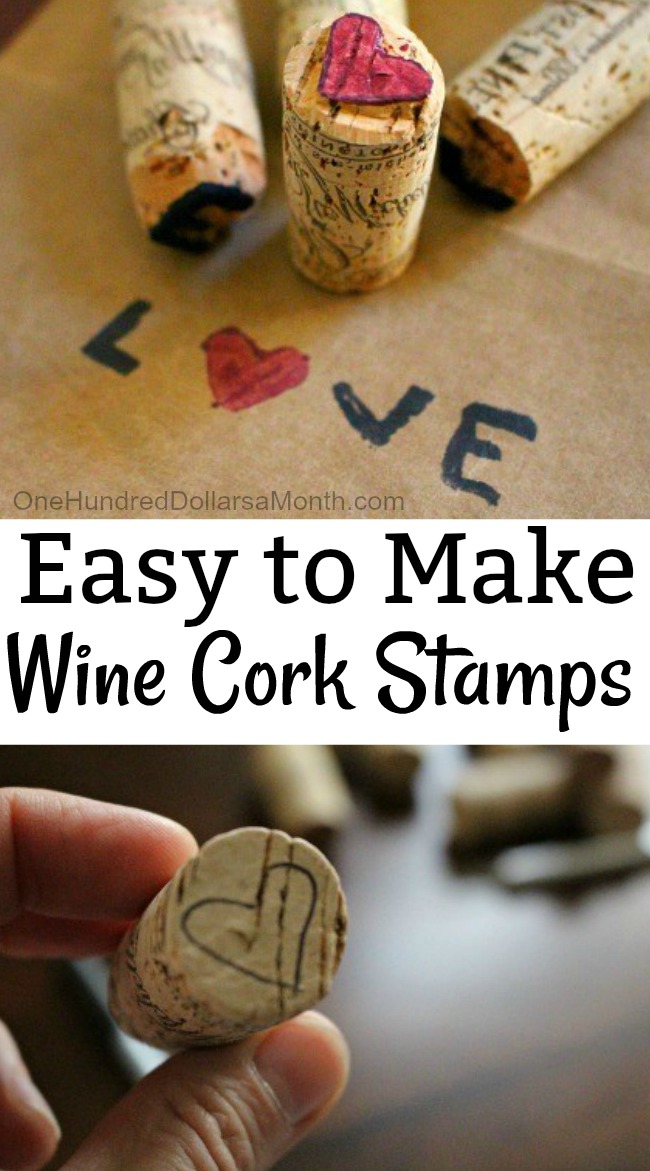
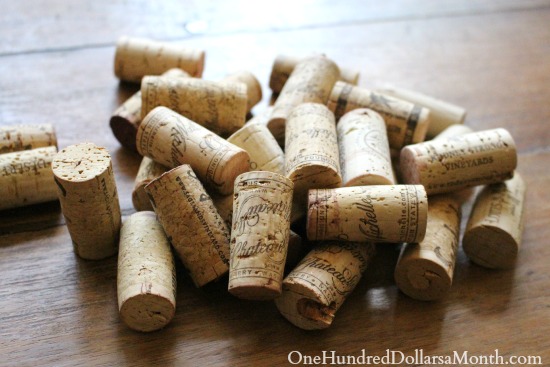
DIY Easy Wine Cork Stamps
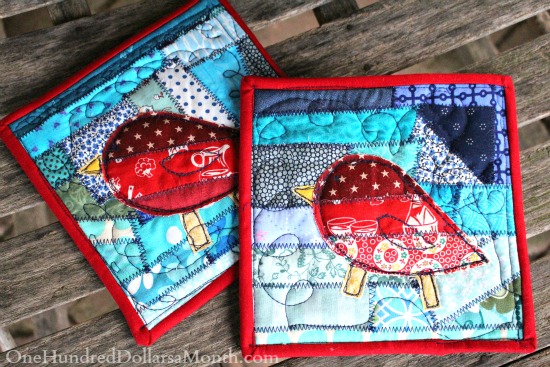
How to Make Crazy Patch Pot Holders
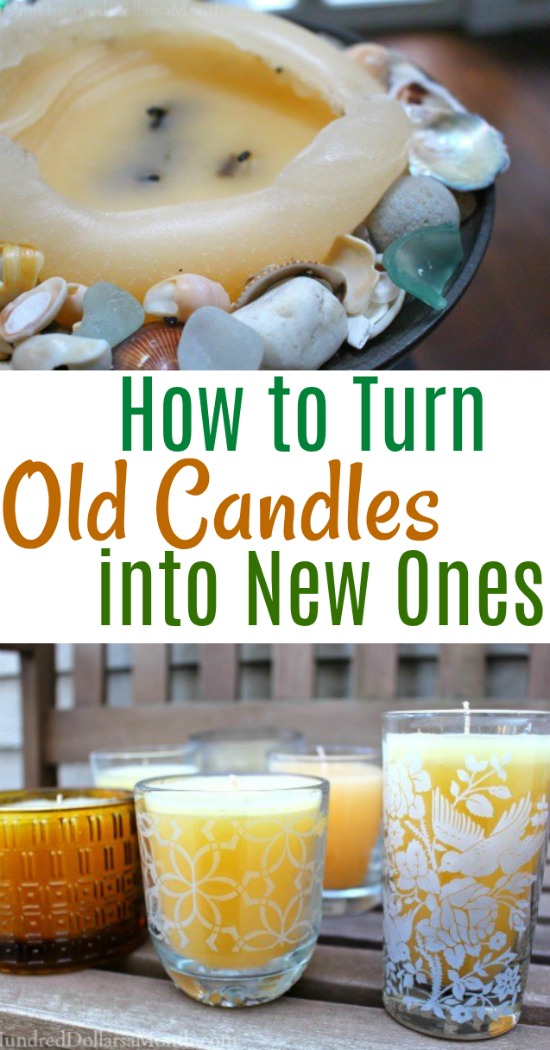
How to Turn Your Old Candles into New Ones
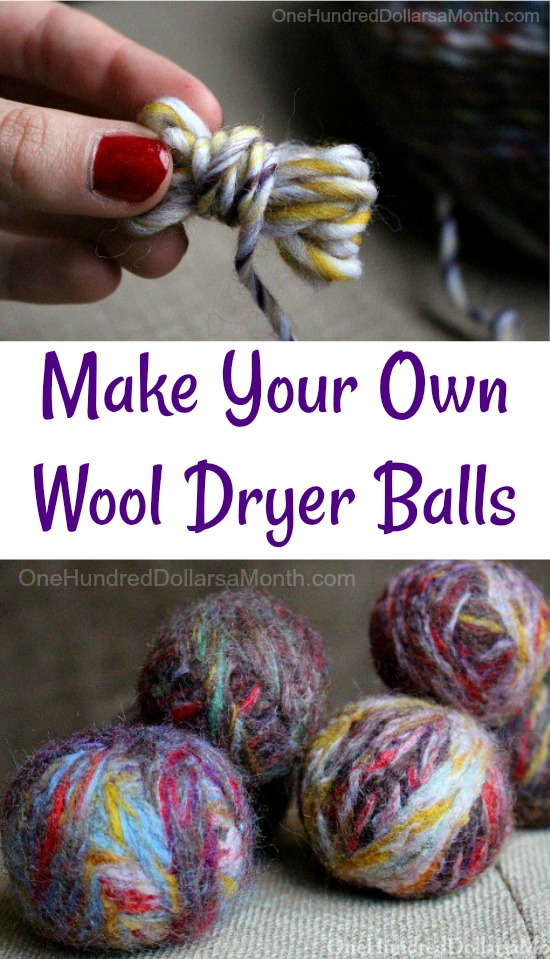
DIY Wool Dryer Balls
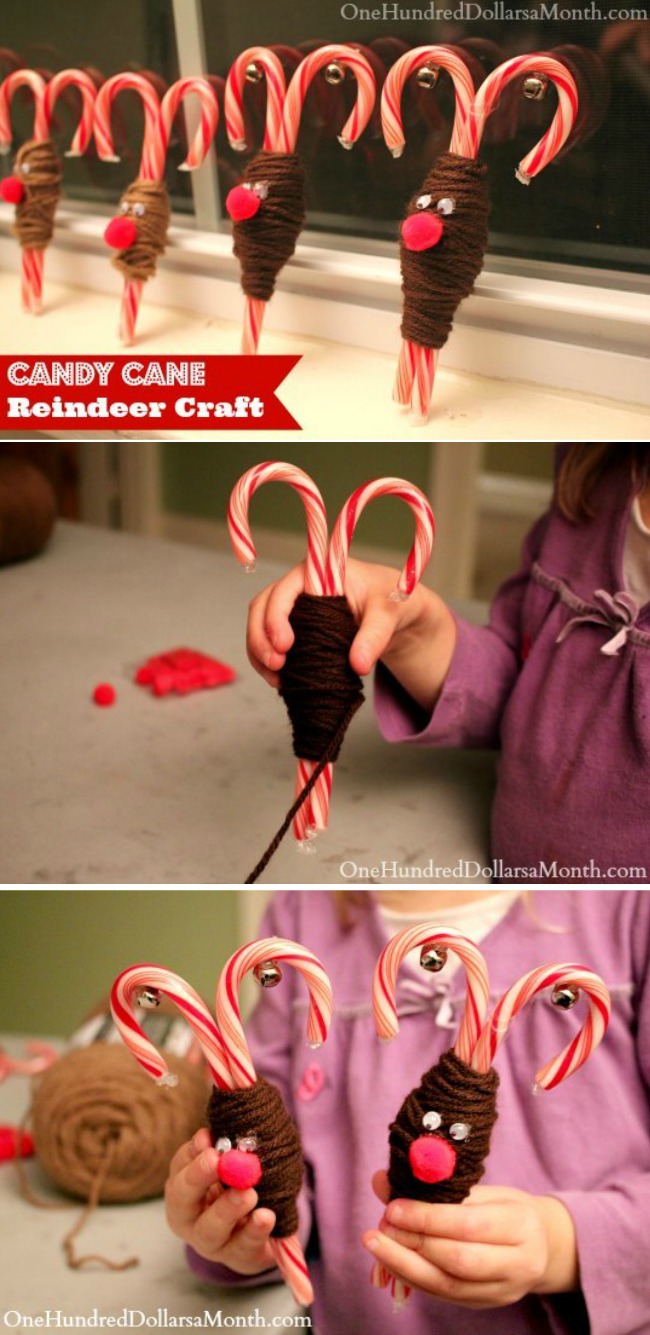
Simple Holiday Kids Crafts – Candy Cane Reindeer
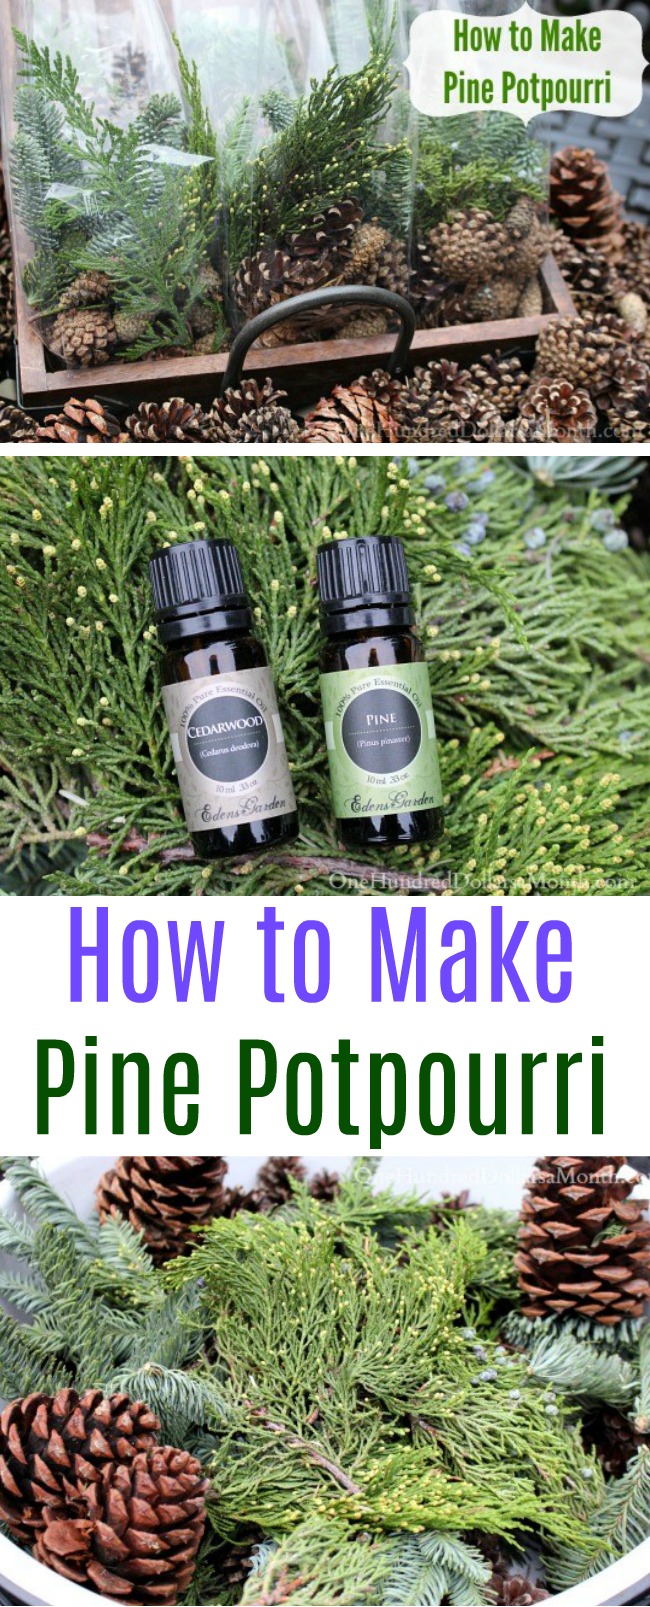
How to Make Pine Potpourri
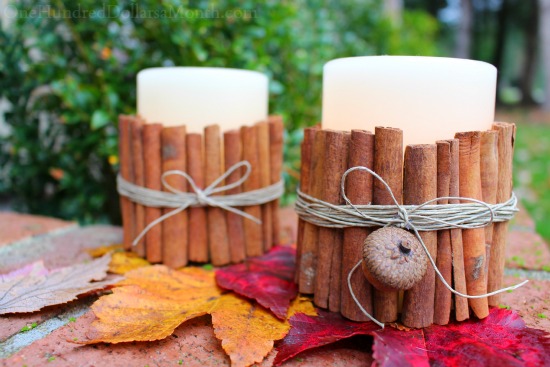
Easy Winter Craft: Cinnamon Stick Candle Holders
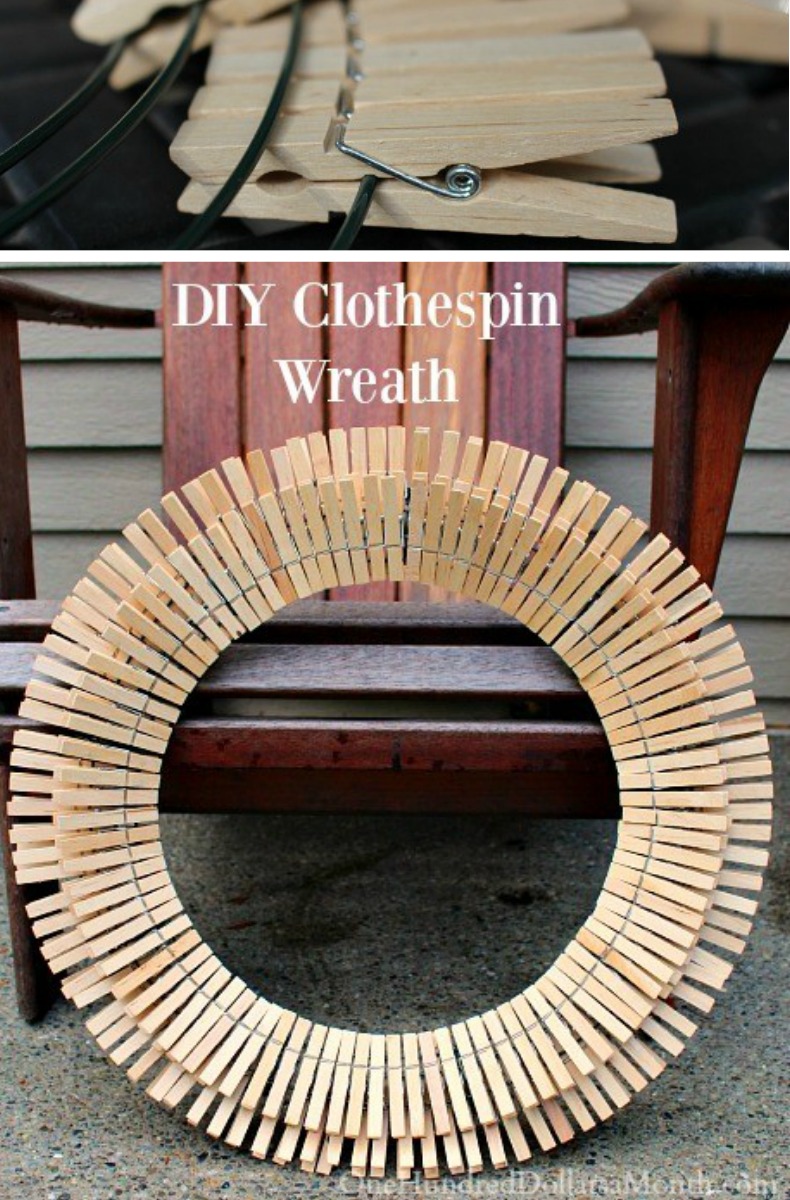
DIY Clothespin Wreath
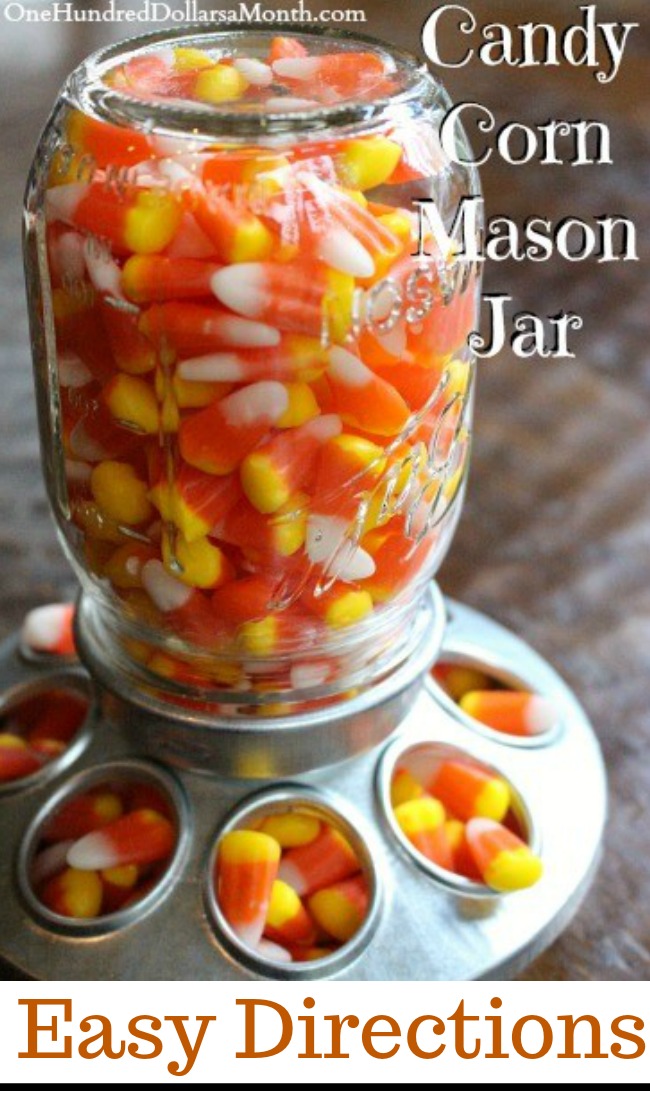
Candy Corn Mason Jar – Upcycling a Mason Jar
Calling All Etsy Sellers: I Want to Promote YOU!

Halloween Craft – Pumpkin Mason Jars
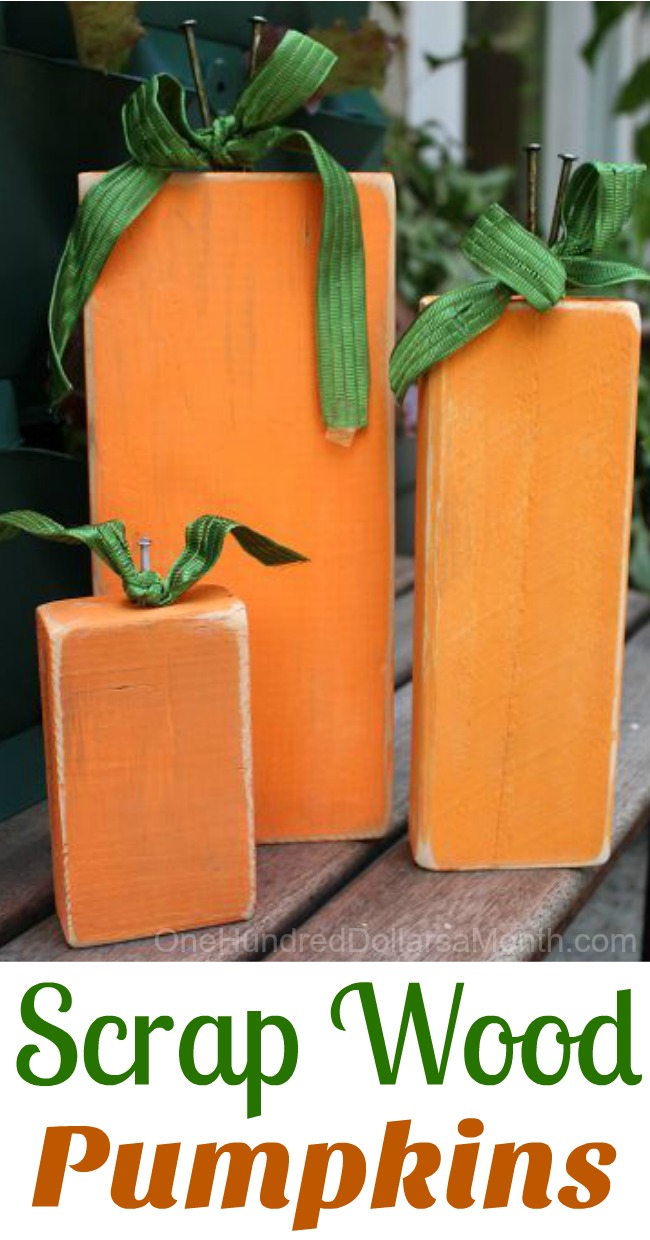
Fall Craft Idea – Painted Scrap Wood Pumpkin
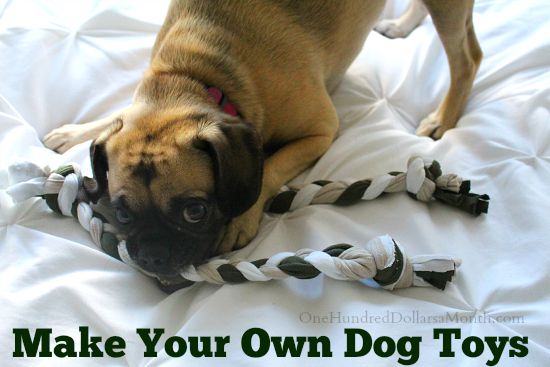
Make Your Own Rope Tug Toy For Dogs
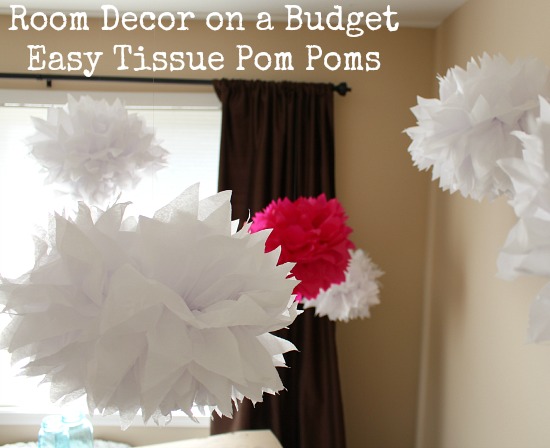
Room Decor on a Budget: Easy Tissue Pom Poms
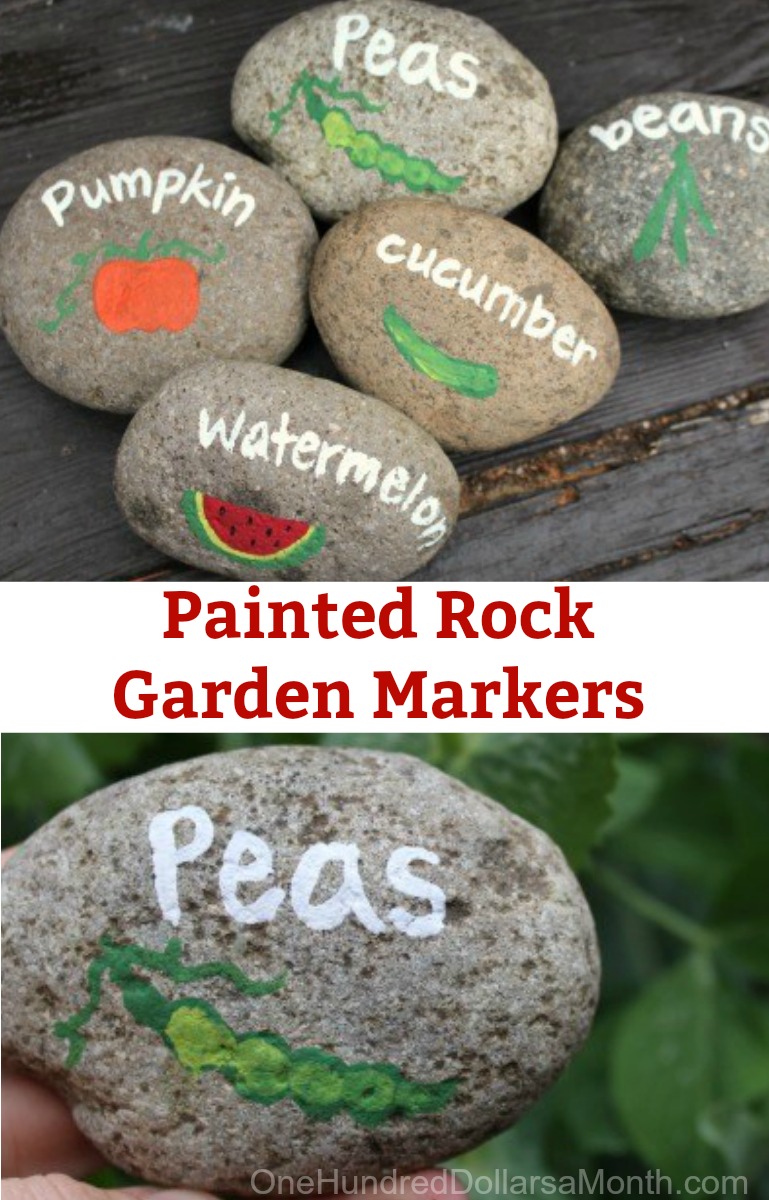
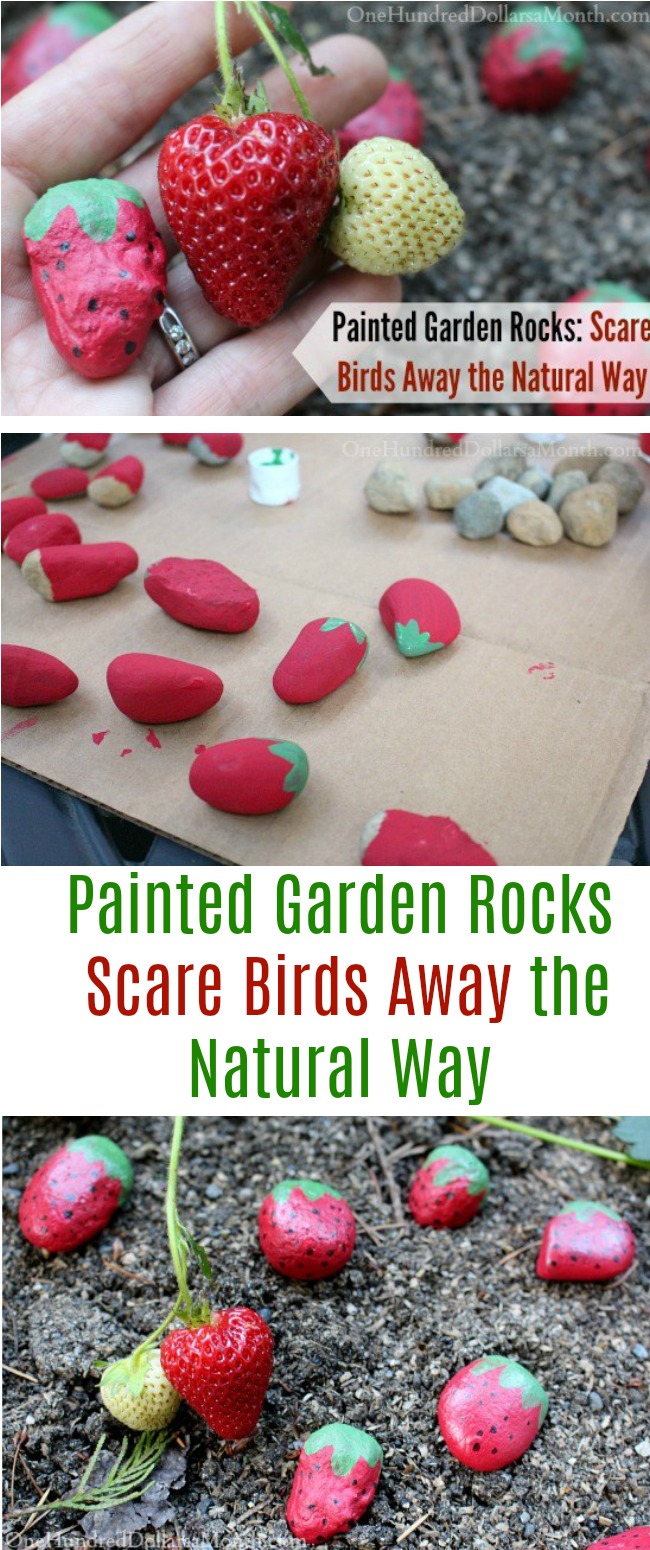
DIY Garden Markers Using Painted Rocks
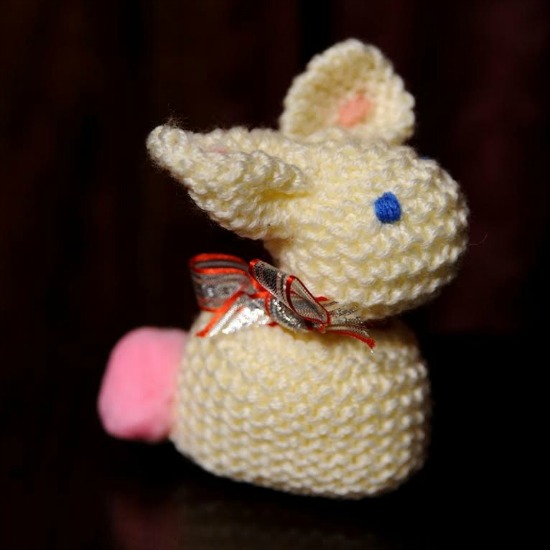
Easy Easter Craft: Knitted Bunnies
Easter Roundup: Easy Crafts & Recipes For Easter
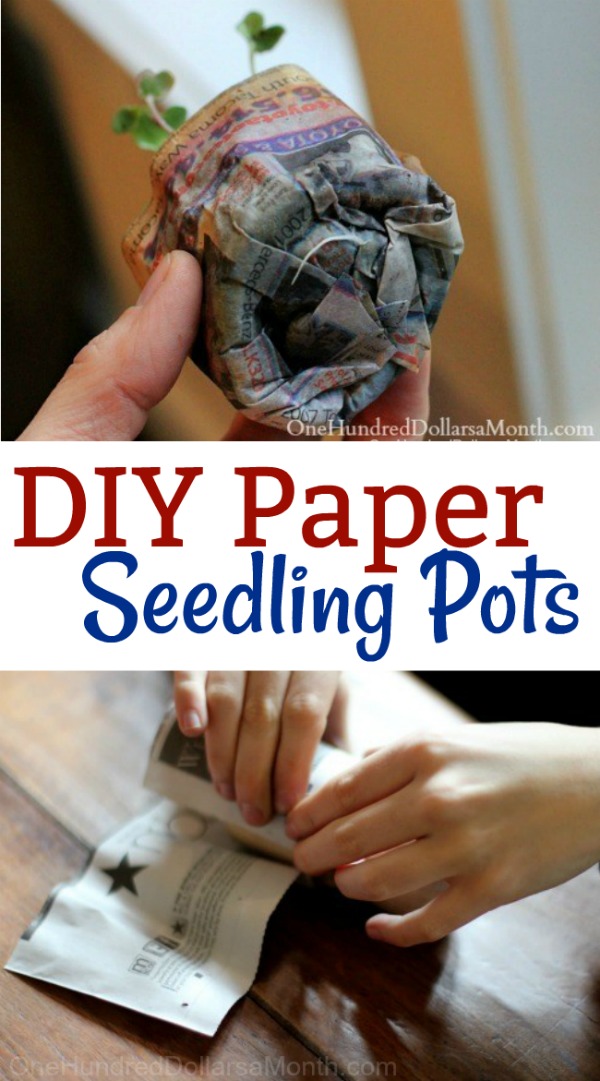
How to Make Newspaper Seedling Pots
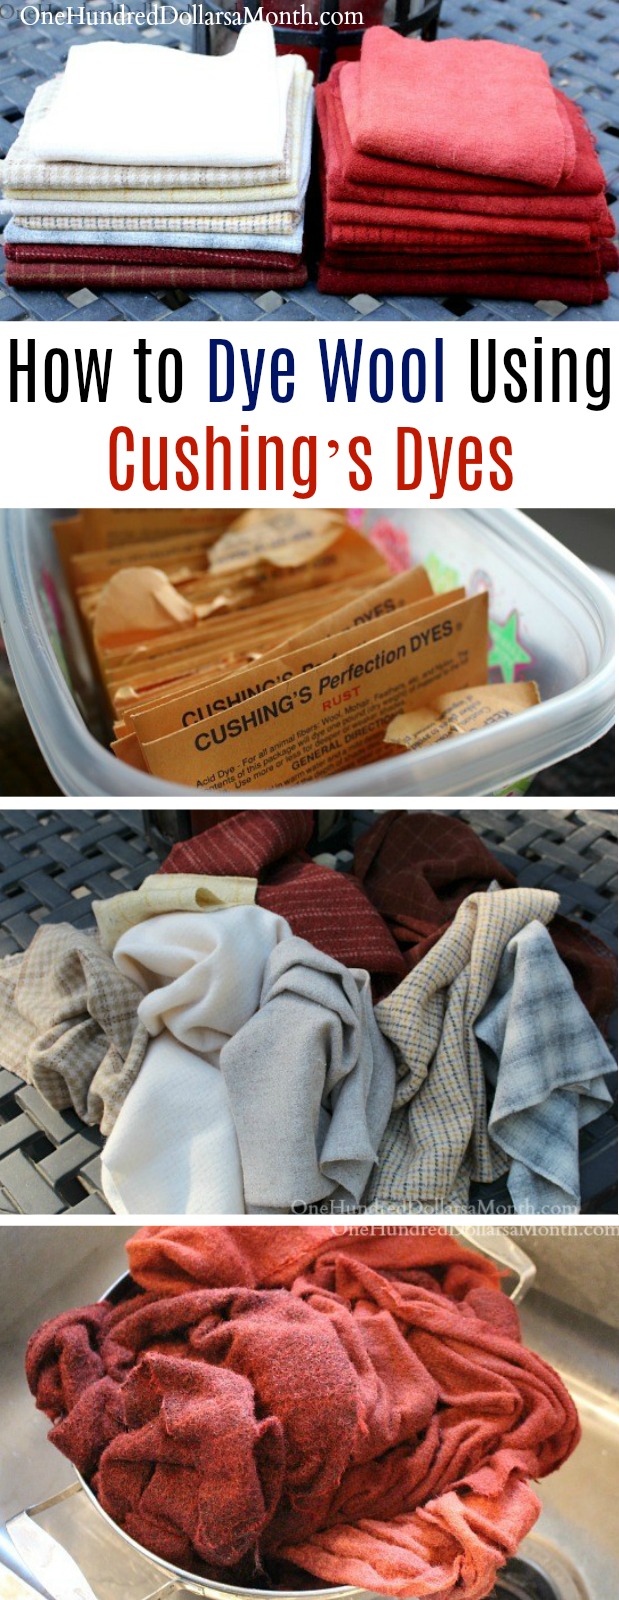
How to Dye Wool for Rug Hooking
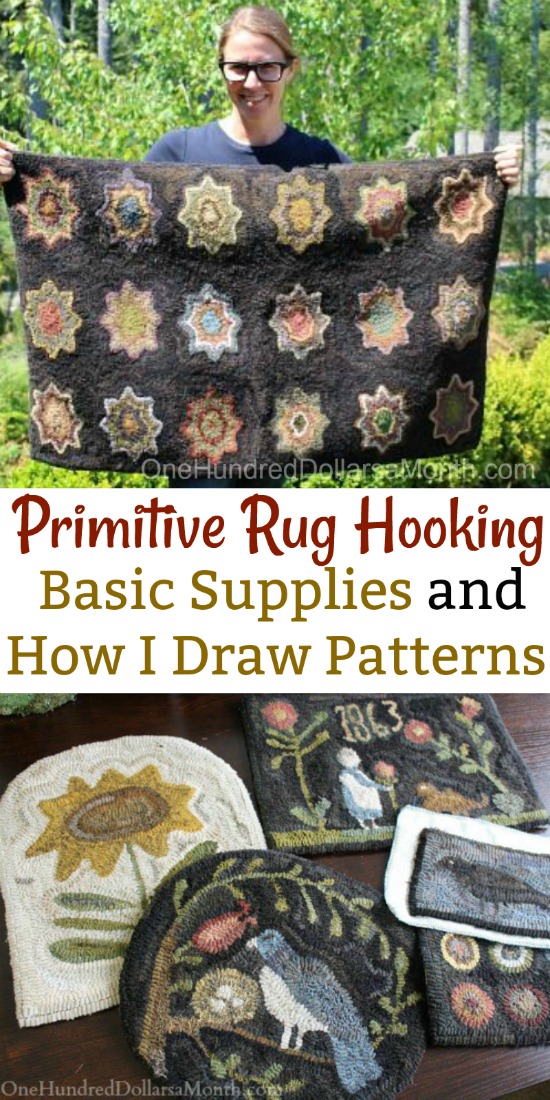
Rug Hooking for Beginners
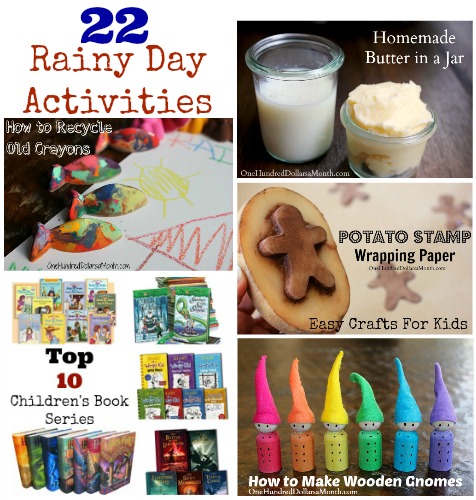
22 Things For Kids to Do on a Rainy Day So They’ll Stop Driving You Crazy
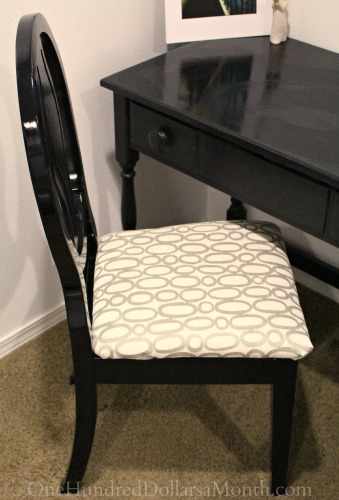
One Man’s Trash is Another Man’s Treasure – Old Chair
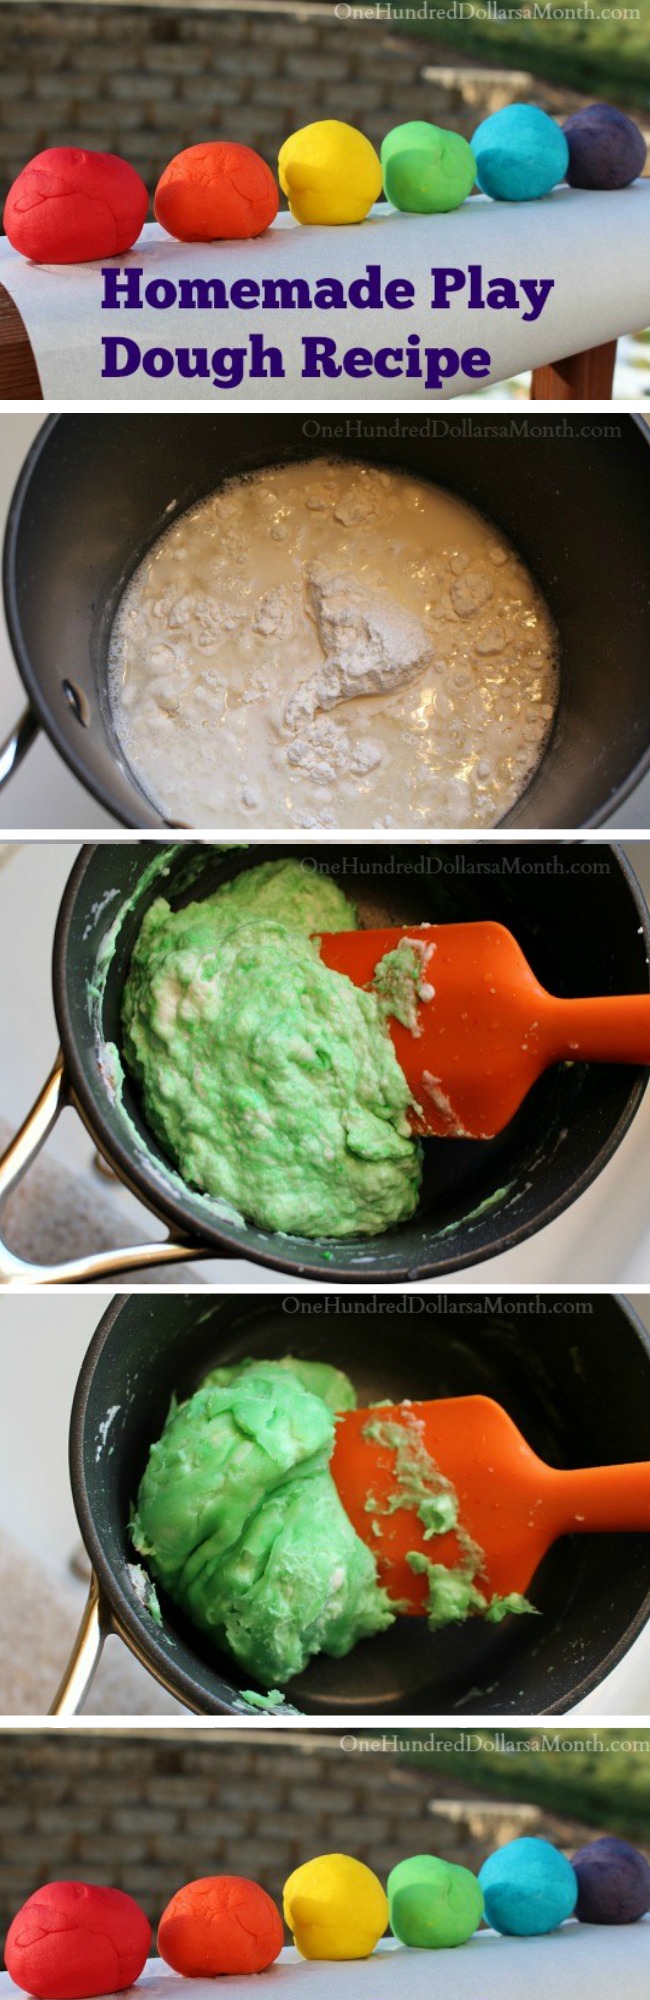
Easy Kids Crafts – Homemade Play Dough Recipe

Easy Directions for a Handmade Christmas Swag
Easy Christmas Craft – DIY Wine Cork Reindeer Ornament

Kid’s Christmas Craft Roundup: 10 Easy Crafts
Easy Christmas Crafts for Kids – Handprint Christmas Wreath
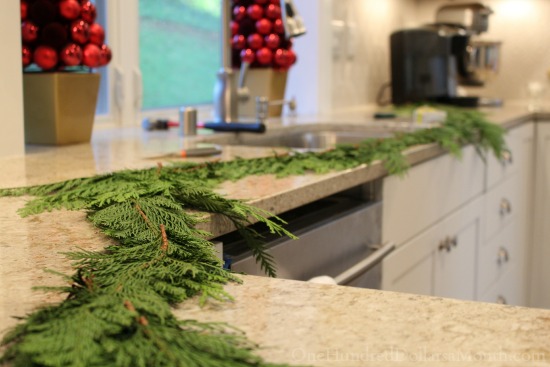
Making a Cedar Christmas Garland From Scratch
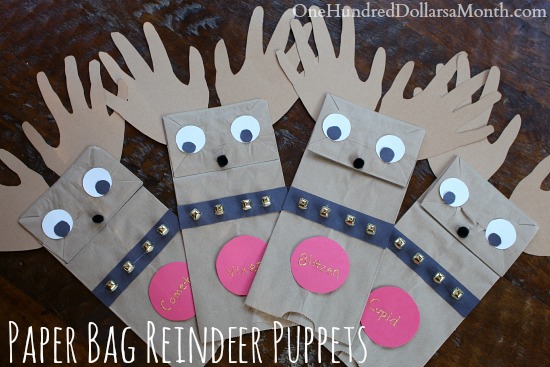
Easy Christmas Crafts for Kids – Paper Bag Reindeer Puppets
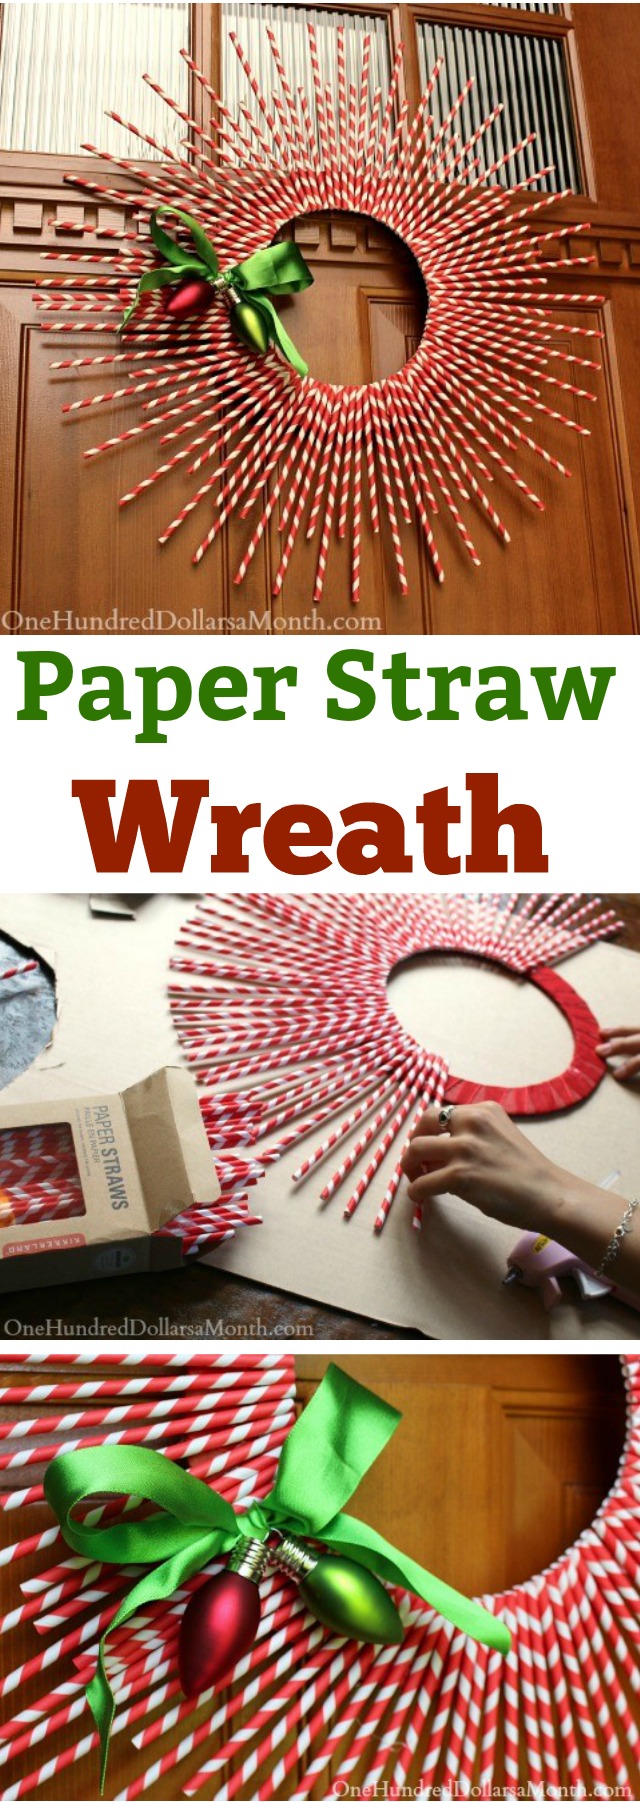
DIY Paper Straw Wreath
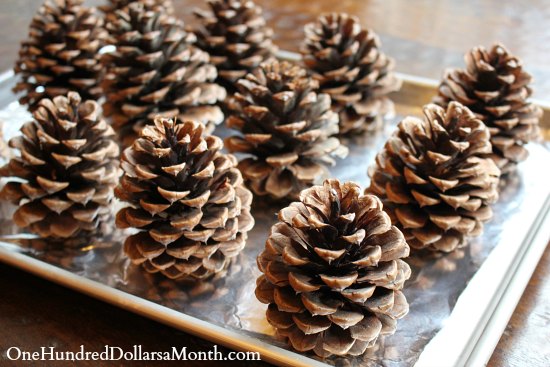
How to Make Scented Pine Cones
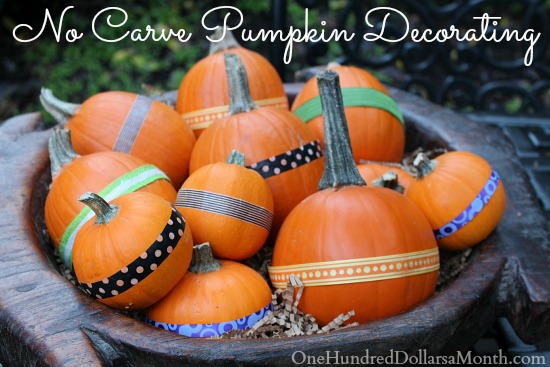
No Carve Pumpkin Decorating Idea – Pumpkins With Ribbons
DIY Easy Canvas Art – Quotes on Canvas

DIY Witch’s Broom Paper Bag Party Favors
Upcycled Picture Frame – DIY Vanity Tray
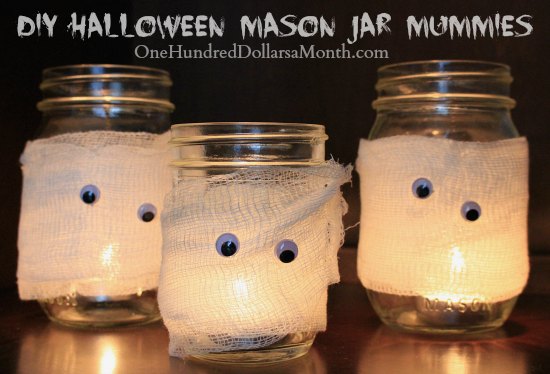
DIY Halloween Mason Jar Mummies
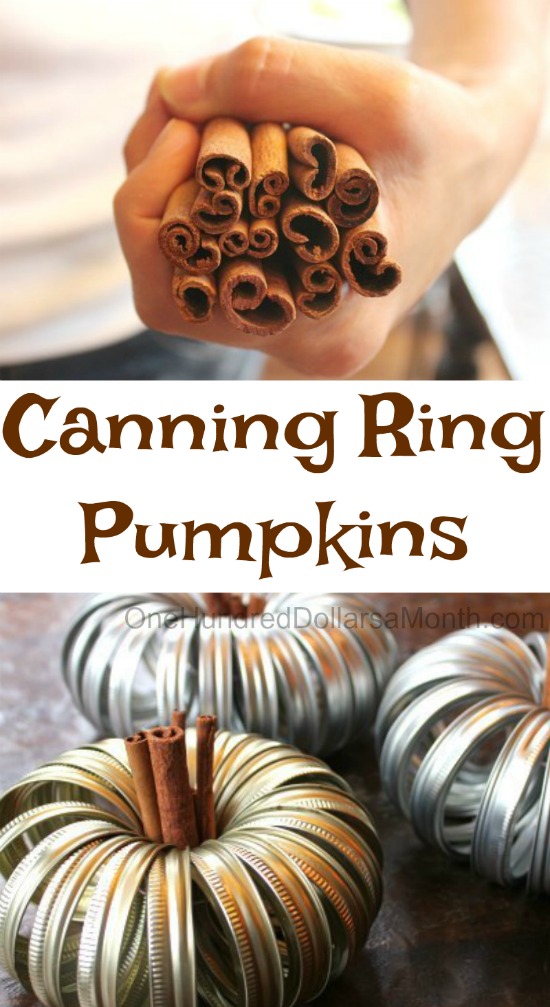
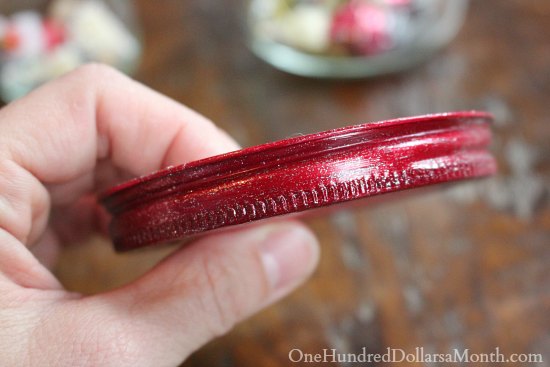
Canning Ring Pumpkin
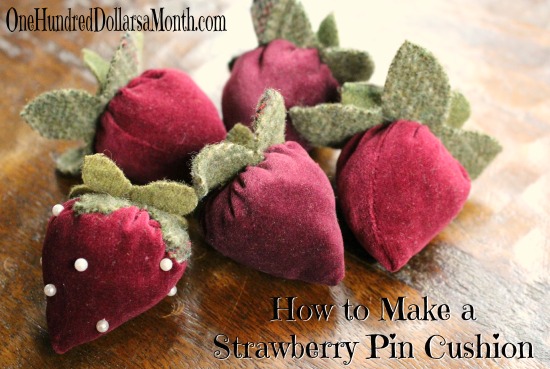
How to Make a Strawberry Pin Cushion
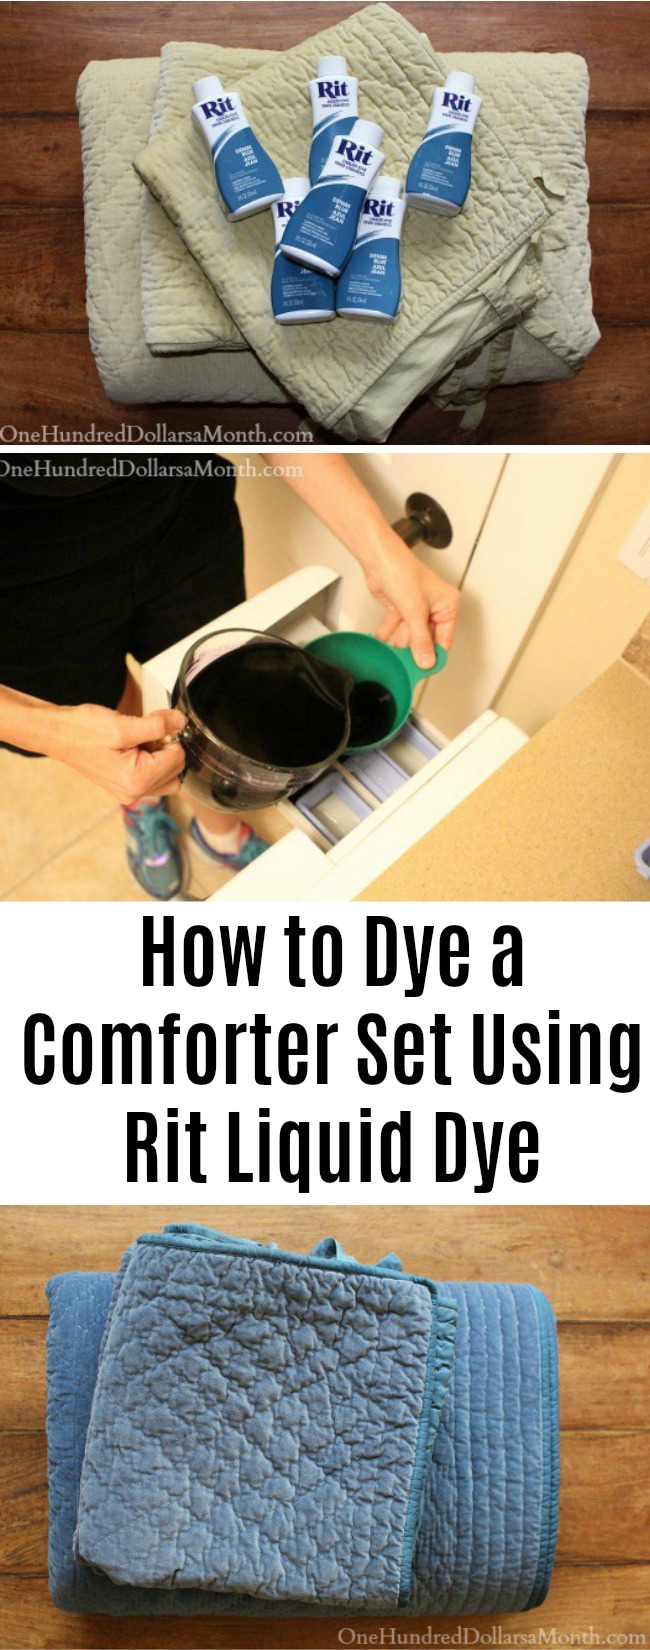
How to Dye a Comforter Set Using a Front Load Washing Machine and Rit Liquid Dye

15 Ways to Boost Your Creativity
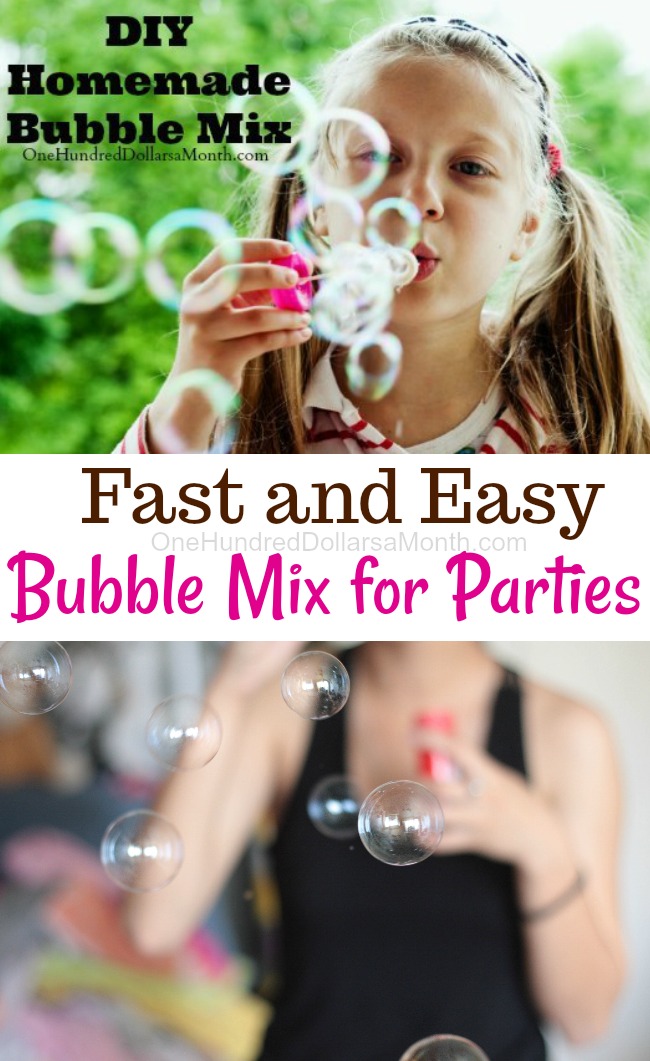
DIY – Homemade Bubble Mix for Kids
DIY Garden Markers Made From Beach Shells
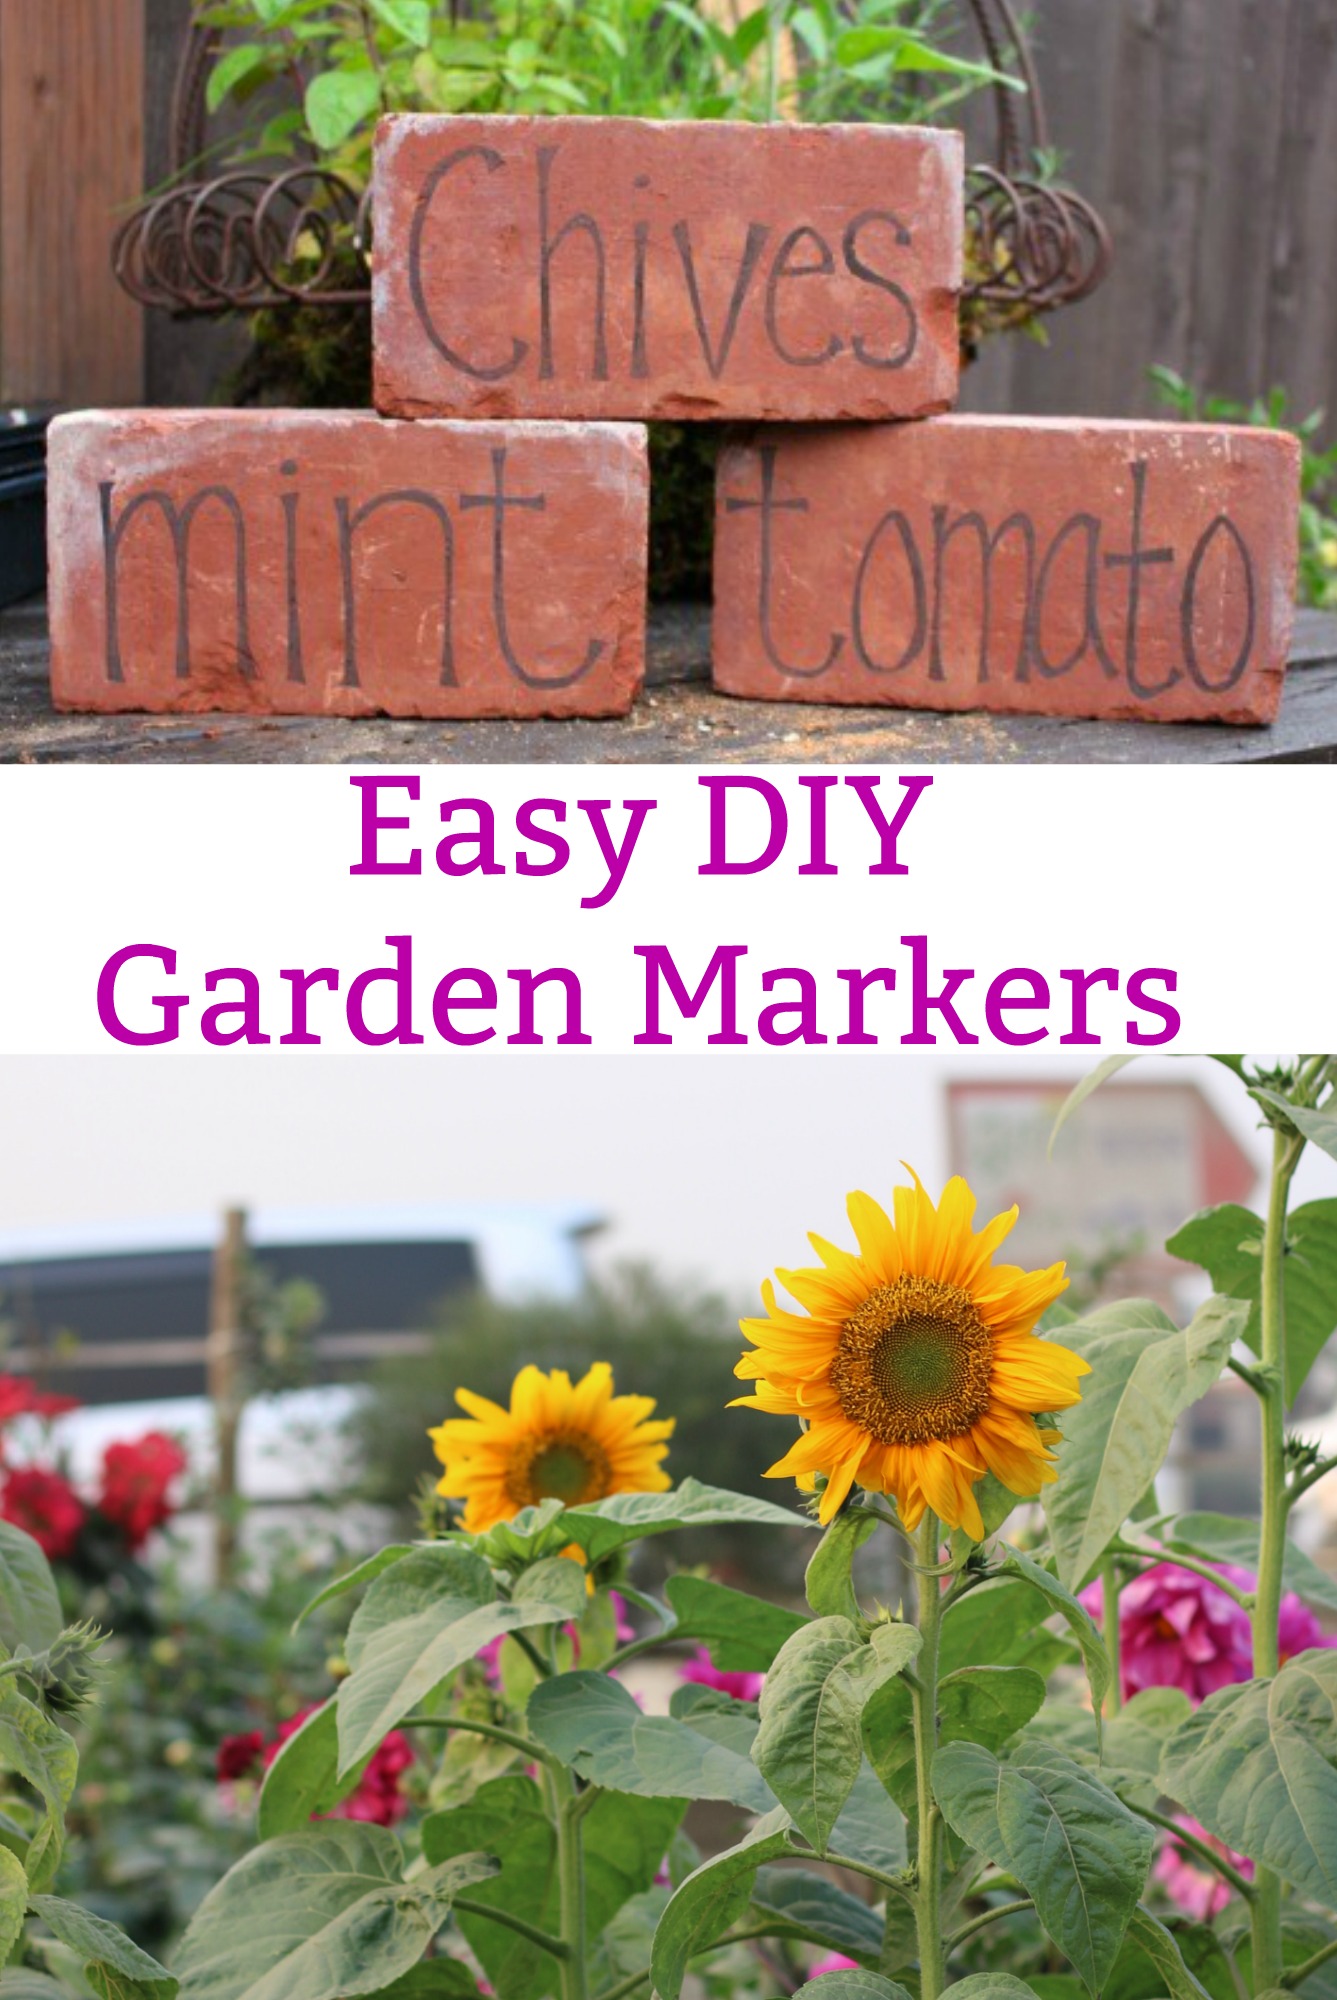
DIY Garden Markers Using Bricks
How to Make a Sponge Ball
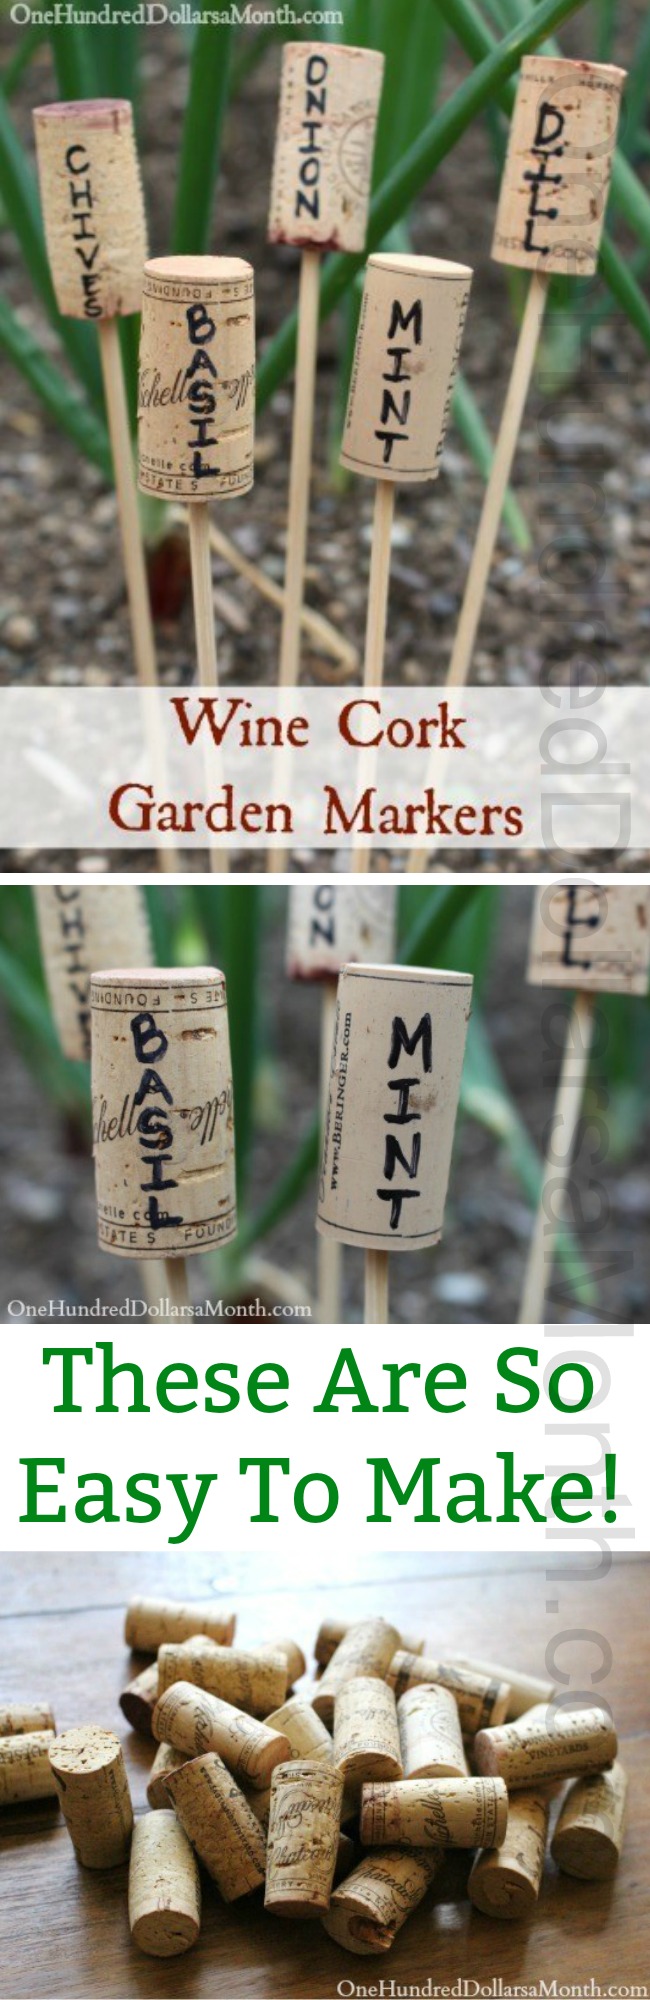
How to Recycle Wine Corks into Plant Markers
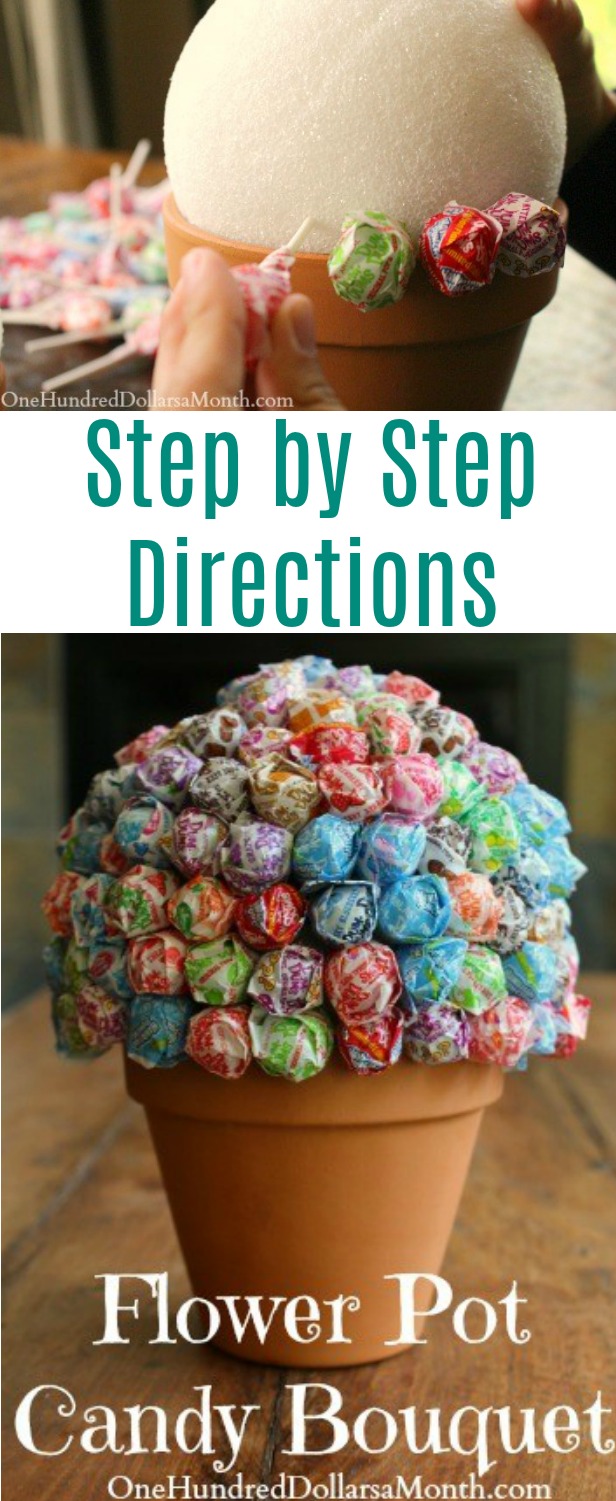
Flower Pot Candy Bouquet
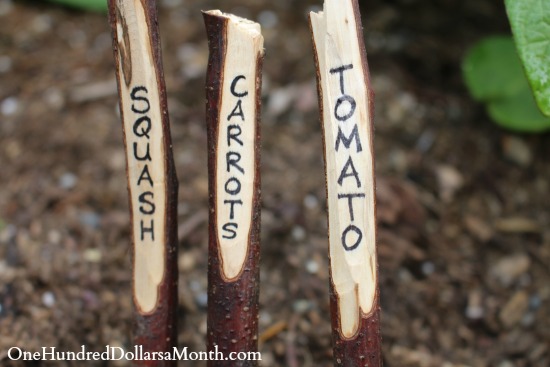
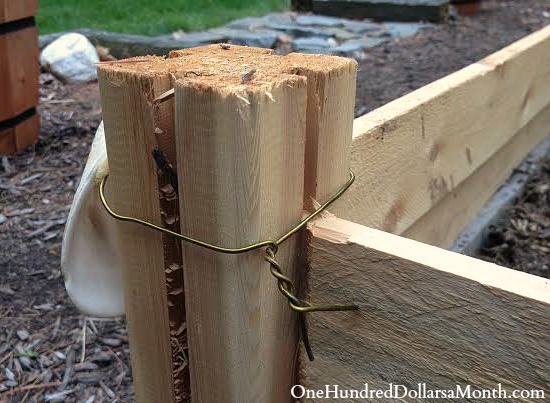
DIY Garden Markers Made From Sticks
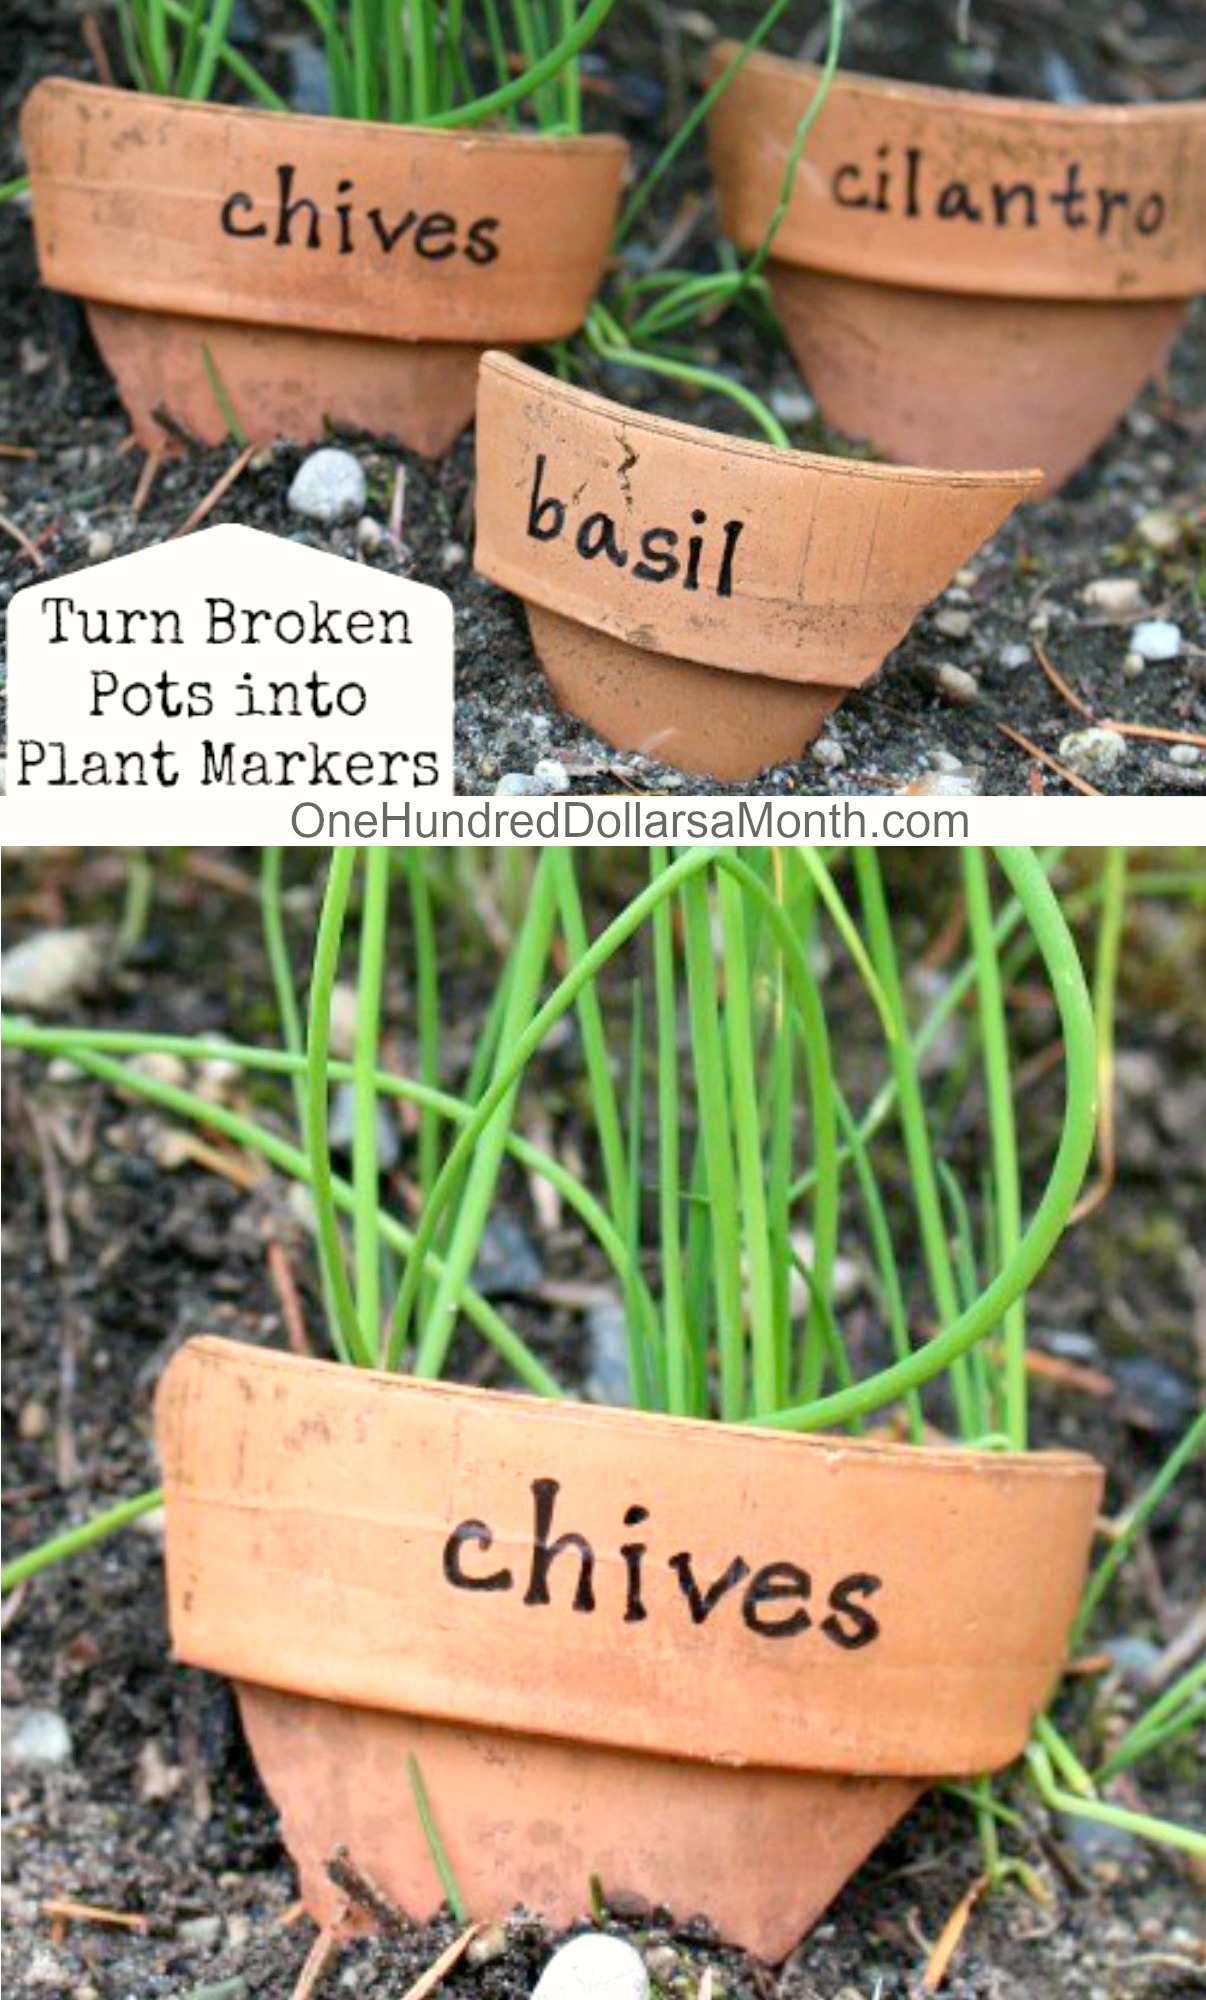
DIY Plant Markers From Broken Pots
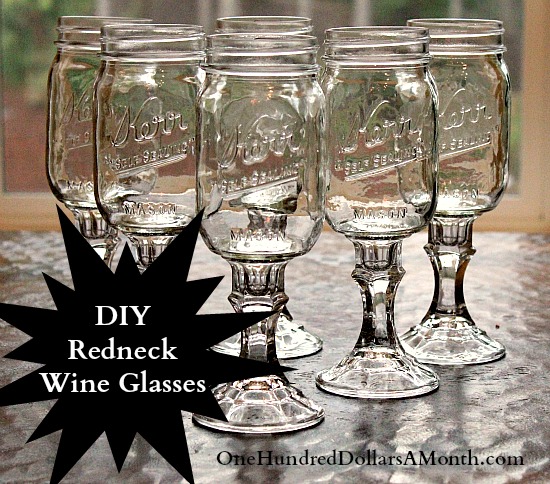
DIY How to Make Redneck Wine Glasses
Dye Eggs With Natural Ingredients
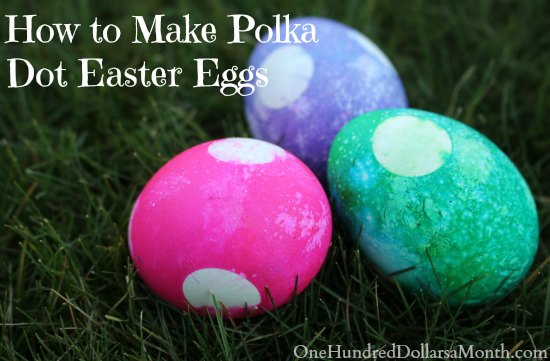
How to Make Polka Dot Easter Eggs

How to Recycle Old Crayons into New Rainbow Crayons
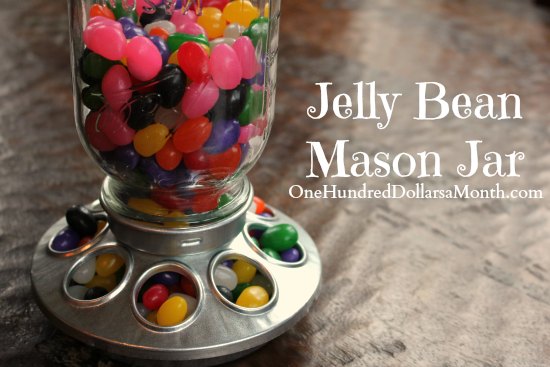
Jelly Bean Mason Jar – Upcycling a Chick Feeder
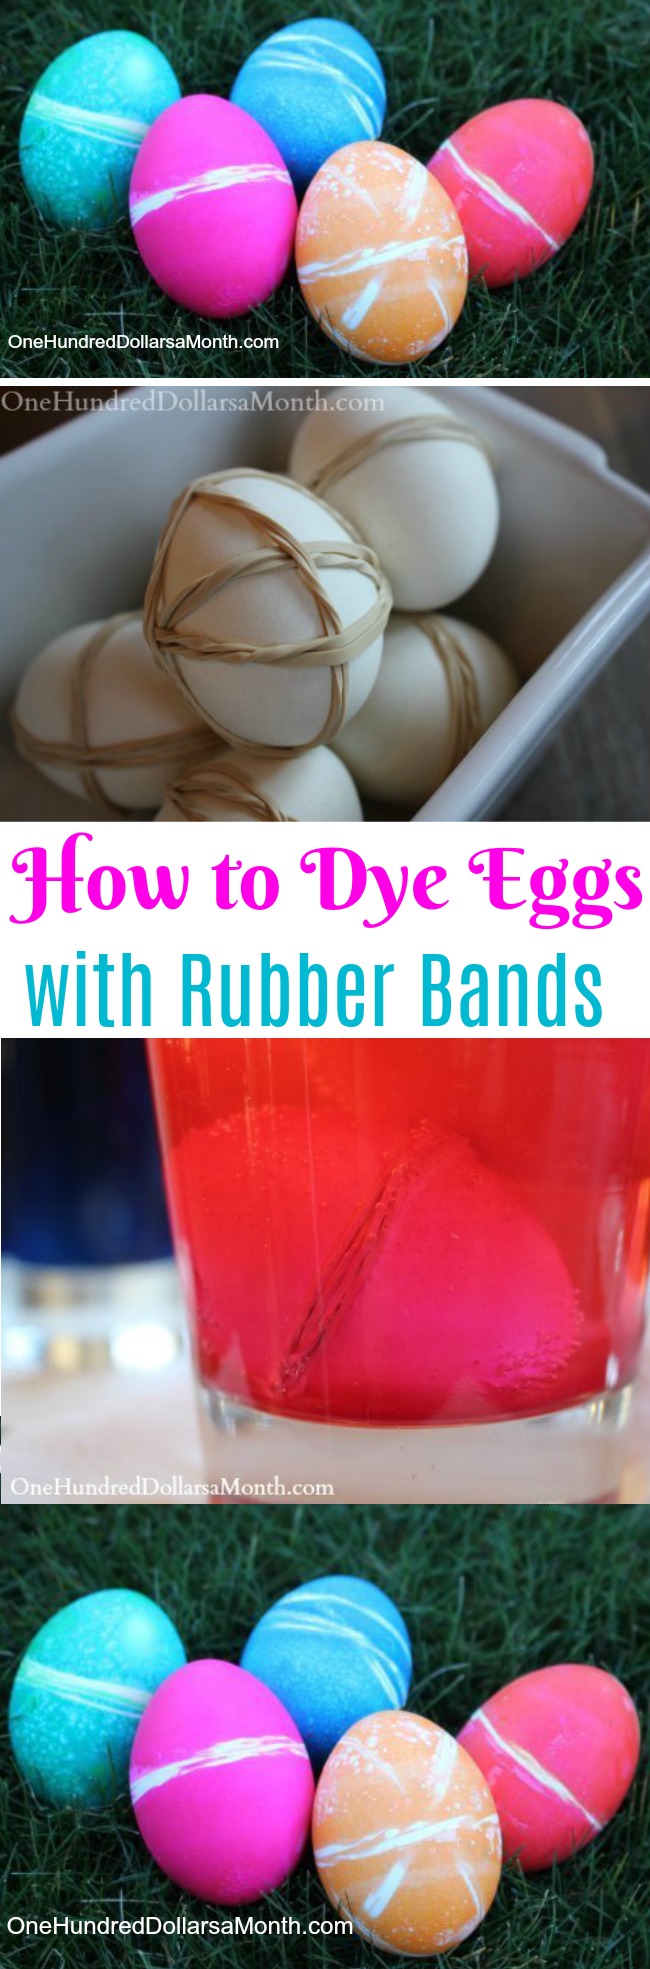
Kids Easter Crafts – How to Dye Eggs with Rubber Bands
Easter Crafts For Kids – Marshmallow Peeps
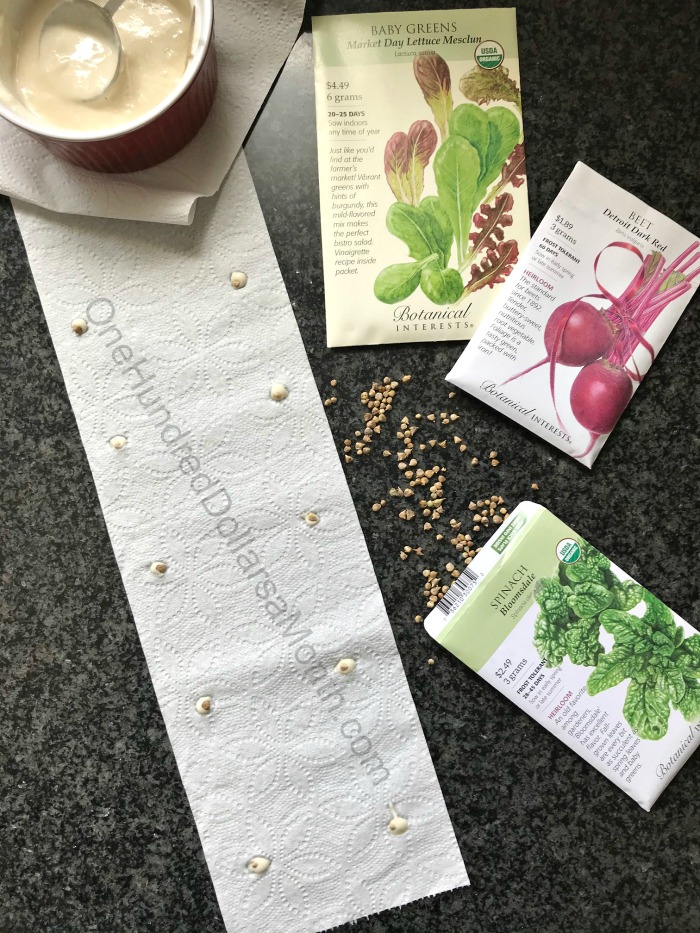
DIY Garden Projects For Kids – How to Make a Seed Tape
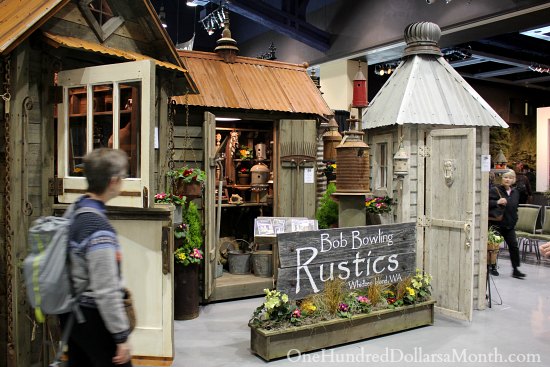
Bob Bowling Rustics – Recycled Garden Sheds and Art
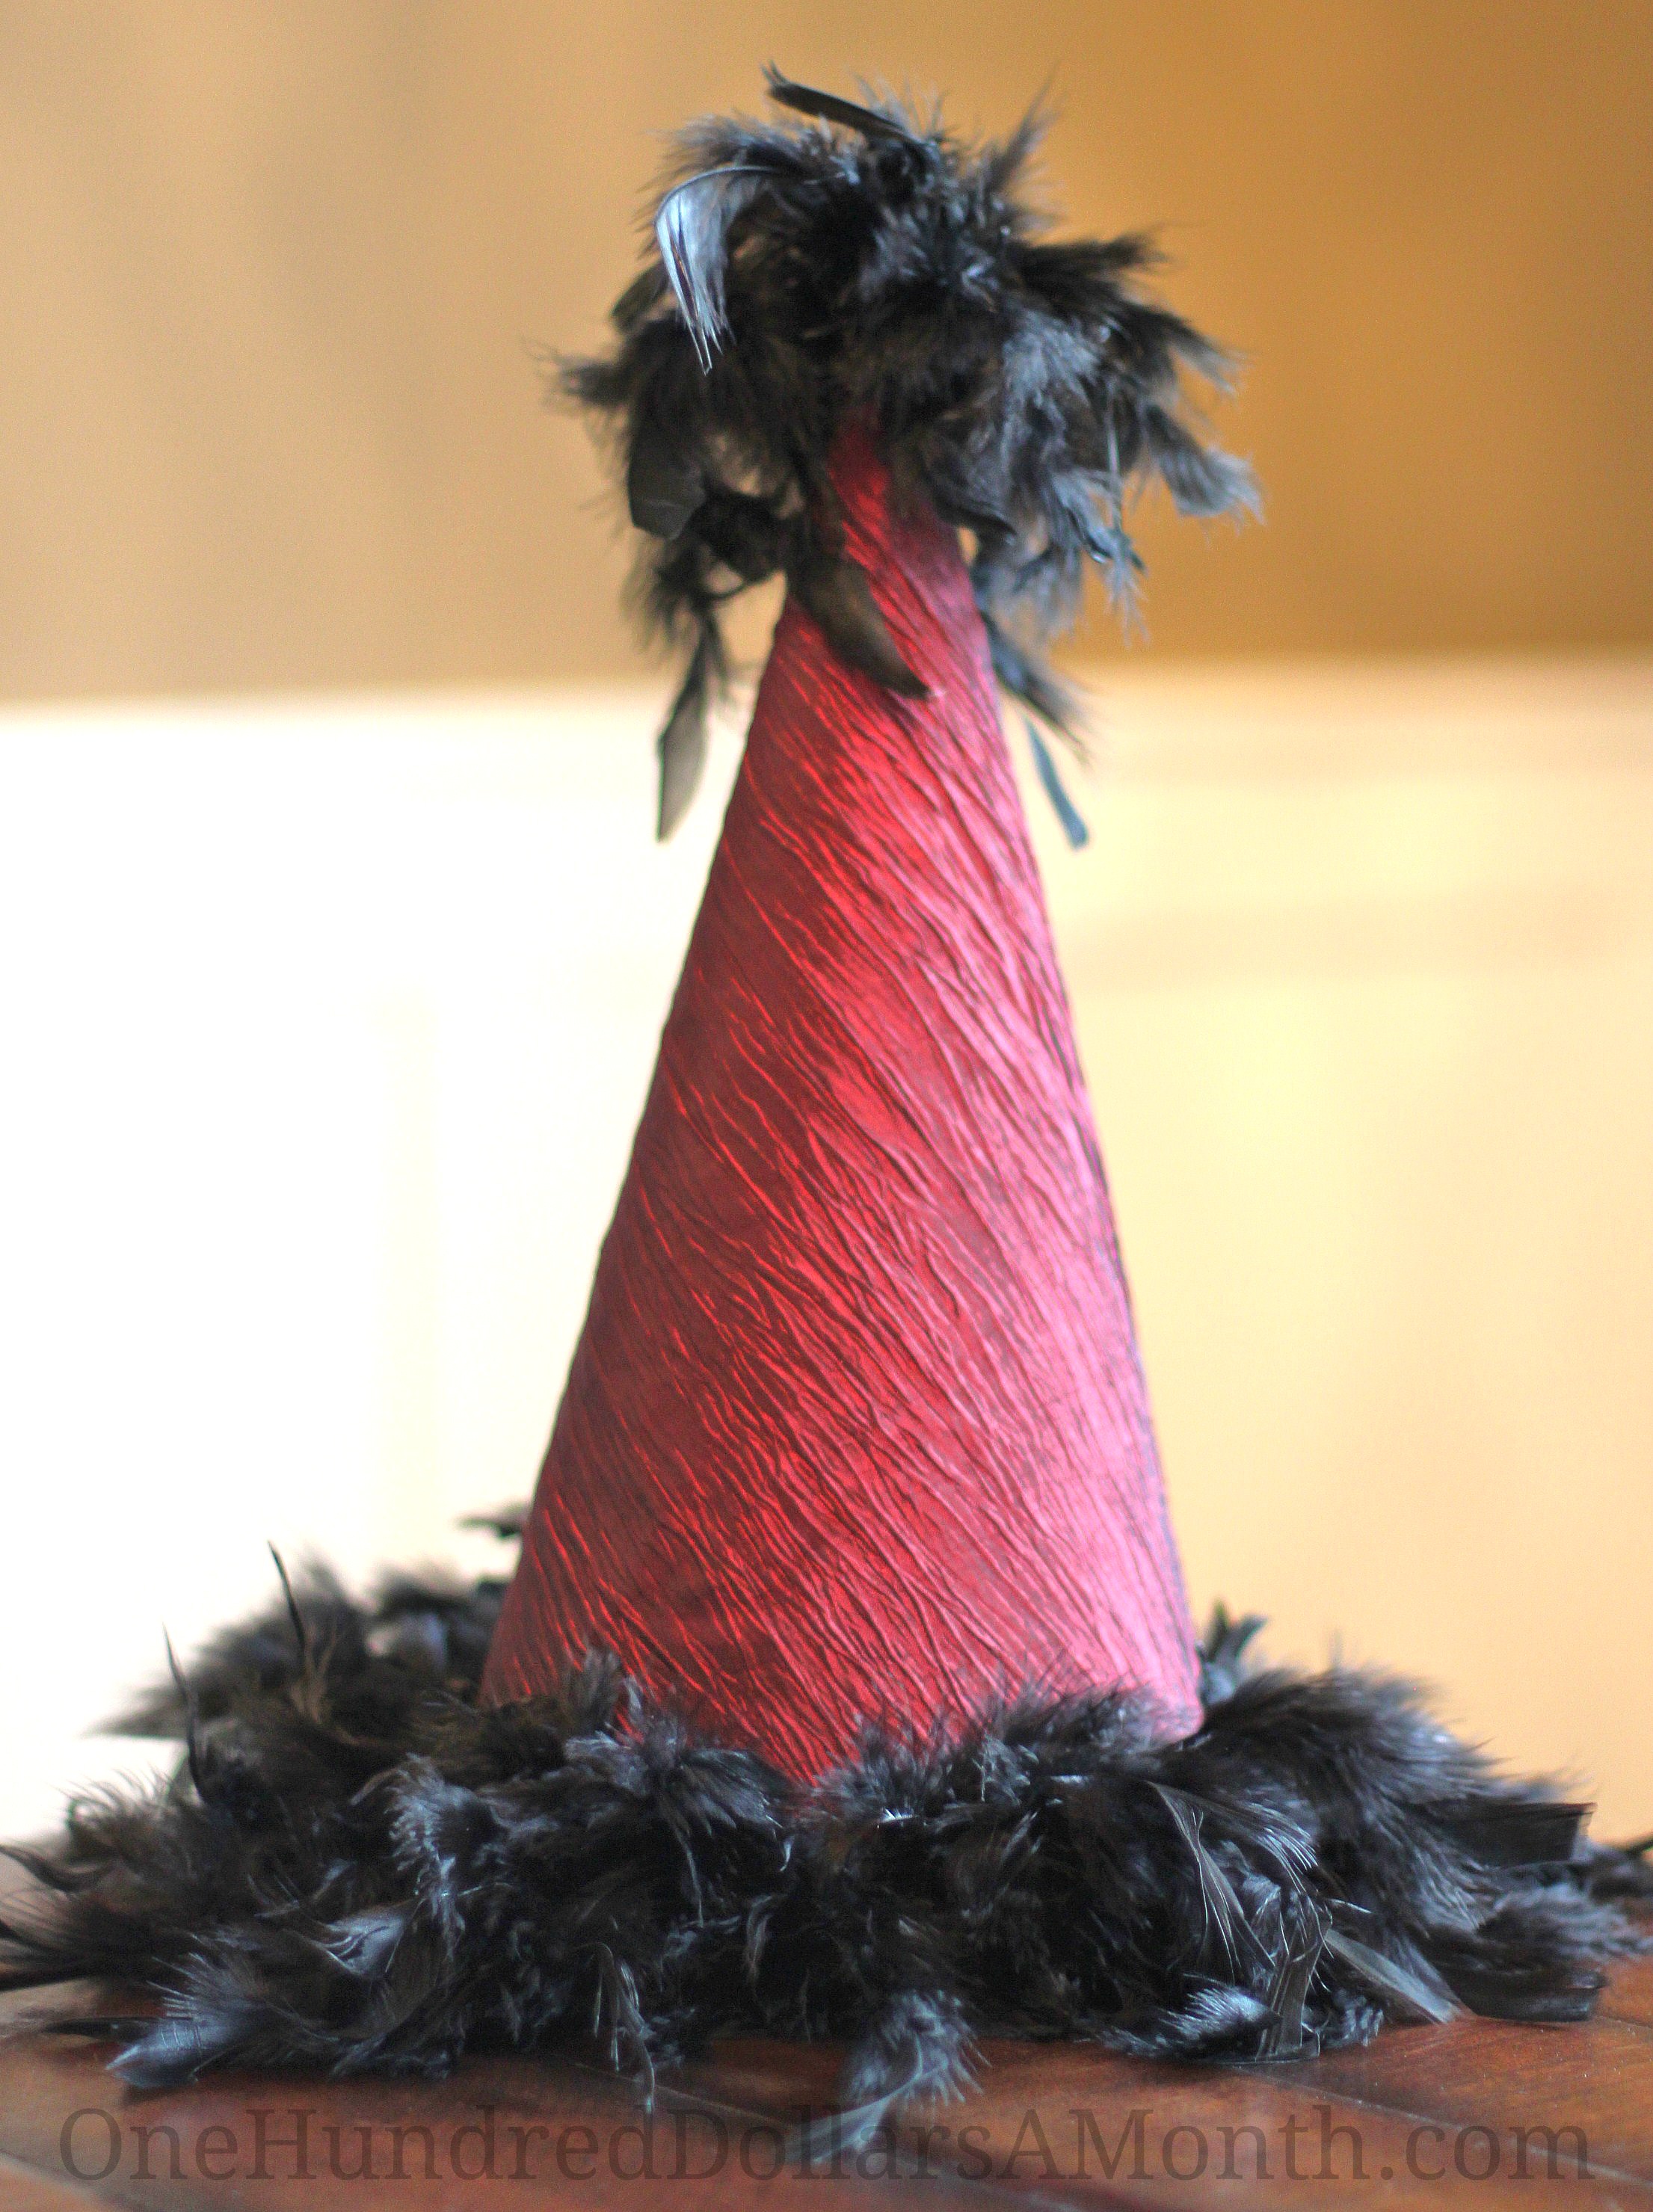
How to Make a Party Hat for New Year’s Eve
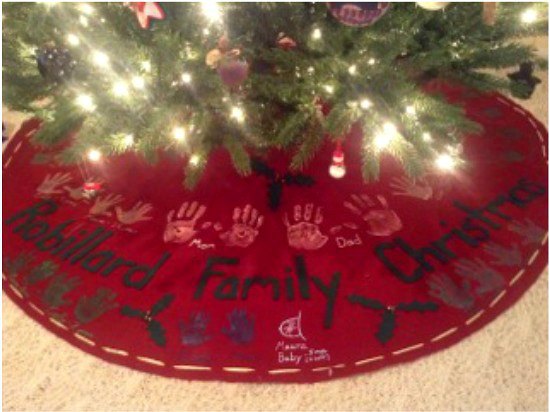
How to Make a No Sew Handprint Christmas Tree Skirt
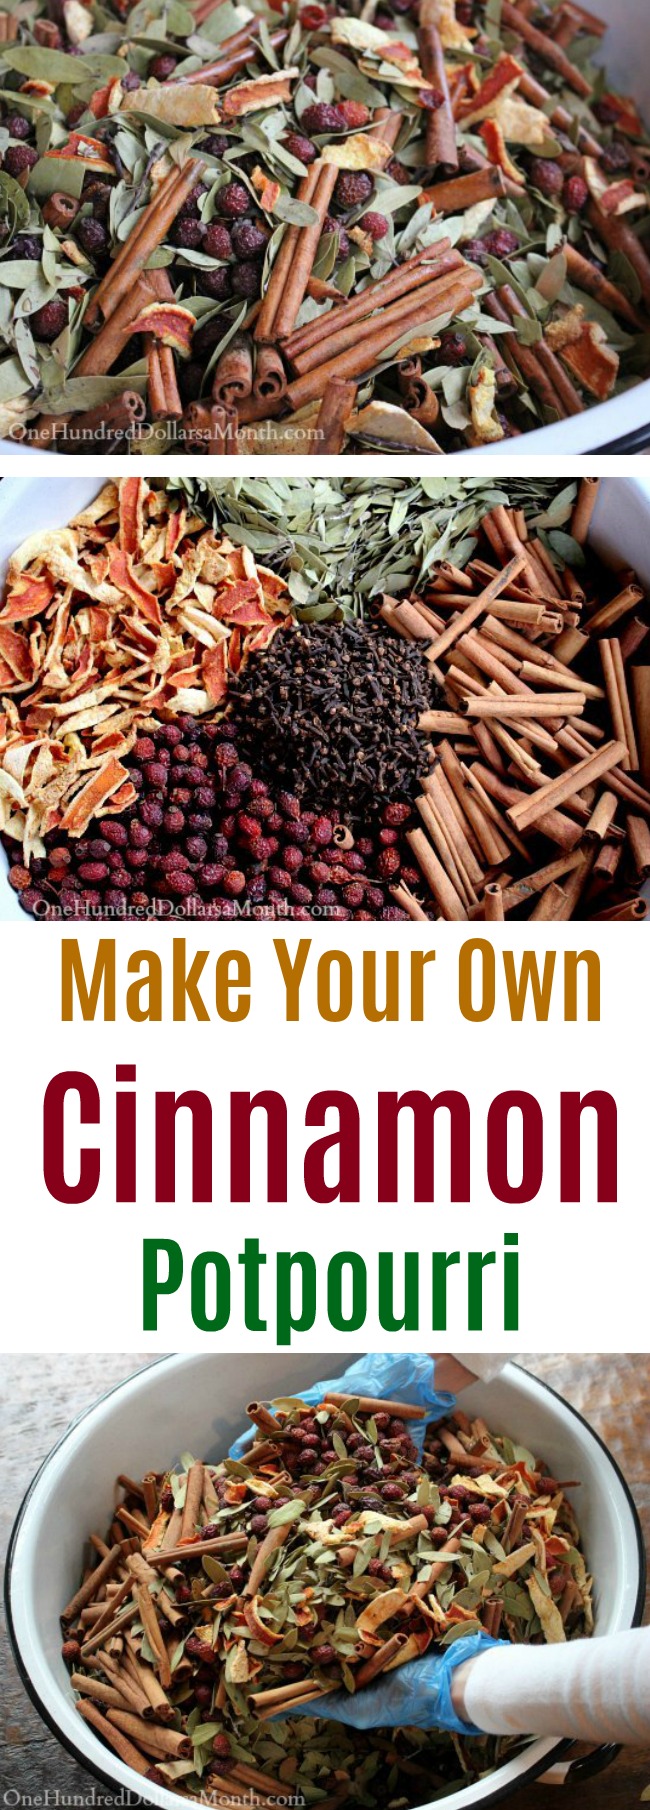
DIY Cinnamon Potpourri
Easy Christmas Crafts for Kids: Waterless Snow Globes
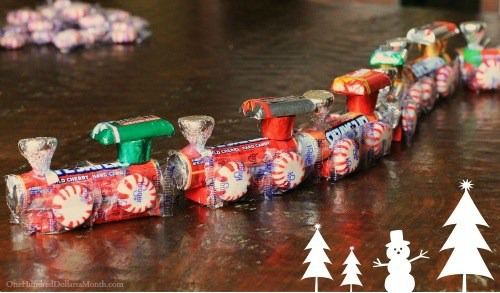
How To Make A Candy Train – Easy Kids Christmas Crafts
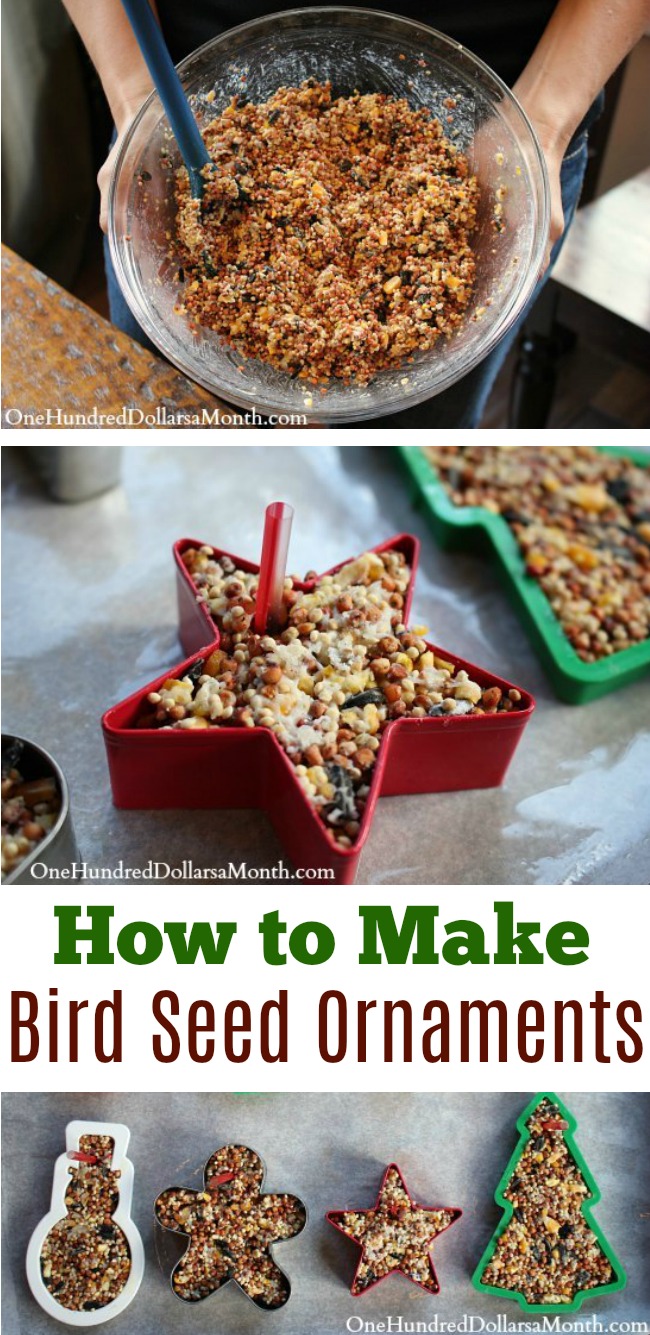
Easy Christmas Crafts – Bird Seed Ornaments
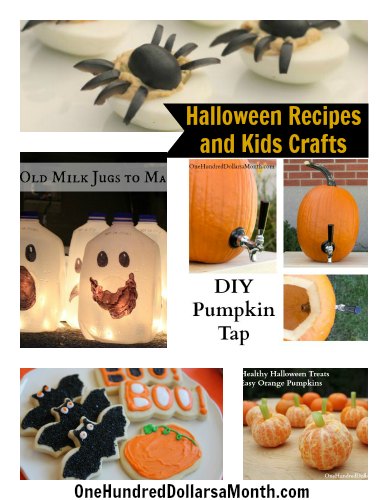
Halloween Recipe and Kids Craft Round Up
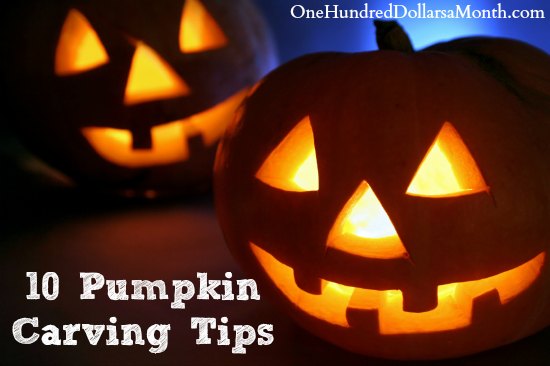
10 Pumpkin Carving Tips
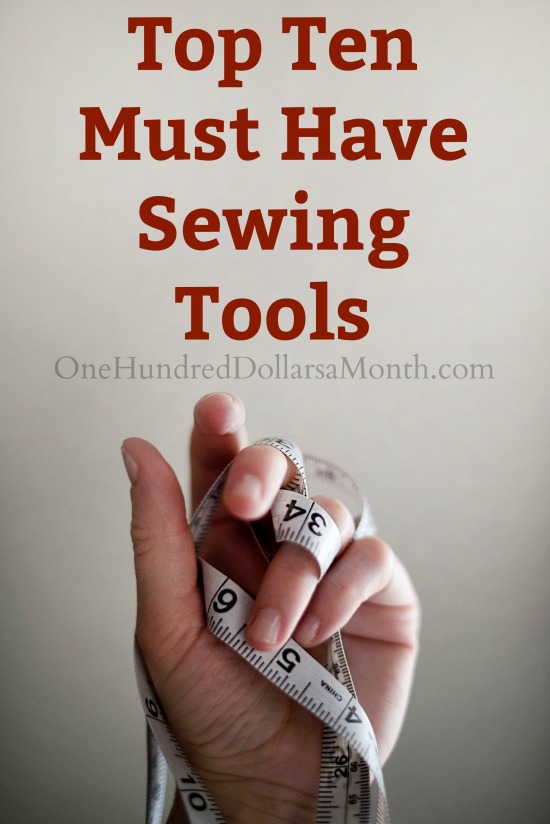
Top Ten Must Have Sewing Tools
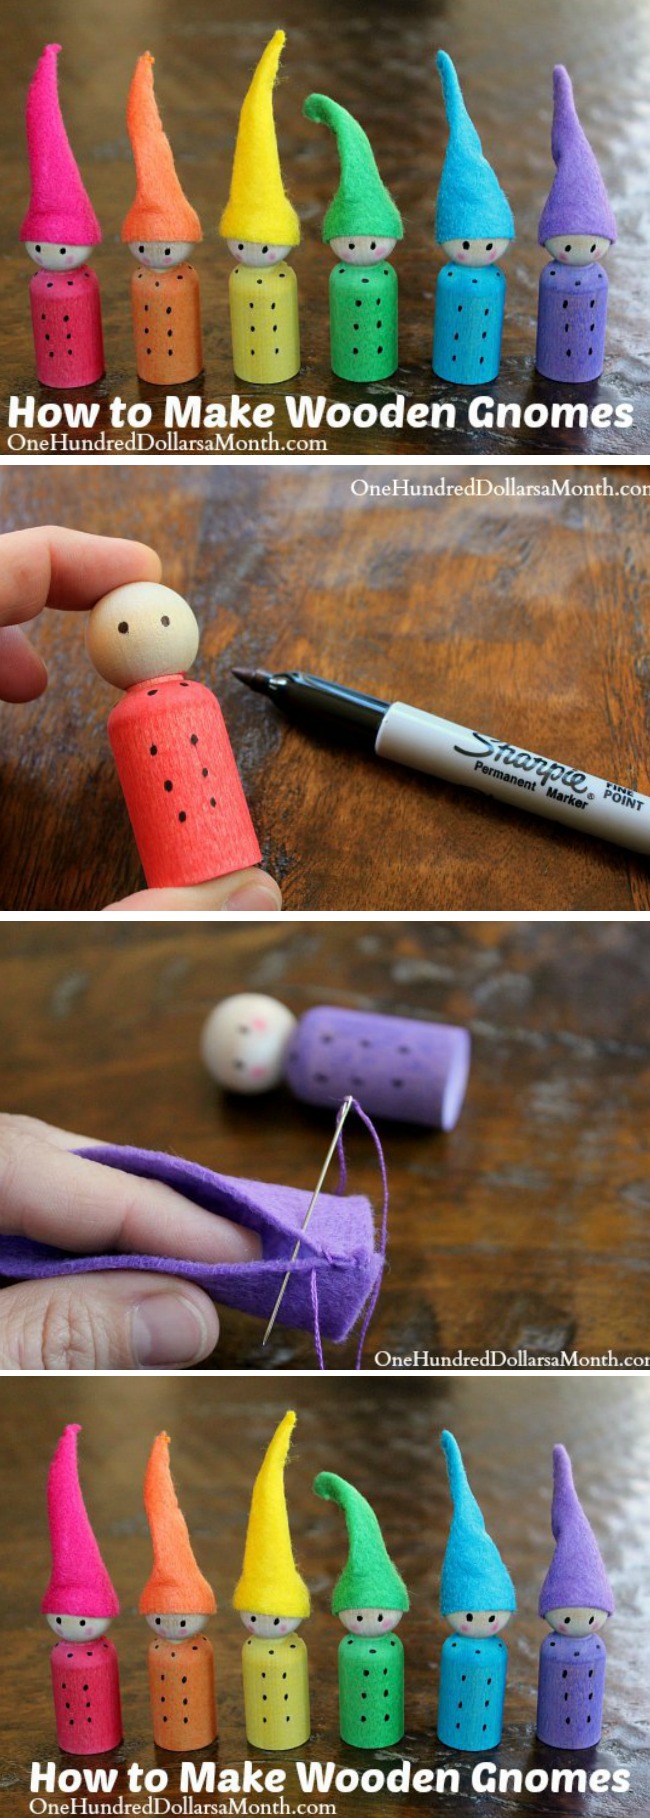
Easy Crafts for Kids – Wooden Gnomes